

On many occasions, it is necessary to have a classified platform. Ideal if we have an SME and need the publication of some commercial requirements that essence is classified. in the light of this, Linux each time has many applications oriented to commercial productivity. In other words, there is an application that does this to you without much effort on our server. In this post, I will show you how to install Open Classifieds on Ubuntu 20.04.
Open Classifieds is the form name of Yclas. It is an application written using PHP language and requires a database manager that allows you to deploy a classified website for our company. One of the great advantages of Open Classifieds is that it is quite light and fast but this does not take away its power. Today the application is a reference in its area. On the other hand, it is open source which makes it possible for us to examine your source code for potential vulnerabilities.
So, let us install Open Classifieds (Yclas) on Ubuntu.
Install Open Classifieds on Ubuntu 20.04
1.- Install LAMP on Ubuntu 20.04
YClas (Open Classifieds) is a web application that requires a web server and a relational database manager. Apache and MariaDB will likely be the most used and easiest to configure so they will be the chosen ones.
So, we are talking specifically about LAMP, so it has to be installed.
How to install LAMP on Ubuntu 20.04?
You also have to include the following PHP modules:
php libapache2-mod-php php-mysql php7.4-gmp php7.4-curl php7.4-intl php7.4-mbstring php7.4-xmlrpc php7.4-gd php7.4-soap php7.4-xml php7.4-cli php7.4-zip php-imagick
When you install them all, you can continue the process.
2.- Creating a new database for the application
Now it is time to create a new database that will be used by YClas (Open Classifieds). At the same time, we will create a new user to avoid using the root user.
So, access the MariaDB shell:
:~$ sudo mysql -u root -p
And start creating the database, the new user, and the corresponding permissions:
CREATE DATABASE openclassifieds;
GRANT ALL PRIVILEGES ON openclassifieds.* TO 'openuser'@'localhost' IDENTIFIED BY 'openpss';
FLUSH PRIVILEGES;
exit;

3.- Configuring PHP to work with YClas (Open Classifieds)
For the application to run smoothly on our server, it is advisable to make some adjustments to the PHP configuration.
So, open the PHP configuration file:
:~$ sudo nano /etc/php/7.4/apache2/php.ini
And change some values:
file_uploads = On
allow_url_fopen = On
short_open_tag = On
memory_limit = 256M
upload_max_filesize = 100M
max_execution_time = 360
Note: You can use CTRL + W to find the lines quickly.
Next, press CTRL + O to save the changes and CTRL + X to close it.
4.- Download Open Classfieds on Ubuntu 20.04
Now we can download Open Classifieds using the wget command.
:~$ wget -c https://github.com/yclas/yclas/archive/master.zip
--2020-07-25 01:07:26-- https://github.com/yclas/yclas/archive/master.zip
Resolving github.com (github.com)… 140.82.114.4
Connecting to github.com (github.com)|140.82.114.4|:443… connected.
HTTP request sent, awaiting response… 302 Found
Location: https://codeload.github.com/yclas/yclas/zip/master [following]
--2020-07-25 01:07:33-- https://codeload.github.com/yclas/yclas/zip/master
Resolving codeload.github.com (codeload.github.com)… 140.82.114.9
Connecting to codeload.github.com (codeload.github.com)|140.82.114.9|:443… connected.
HTTP request sent, awaiting response… 200 OK
Length: unspecified [application/zip]
Saving to: ‘master.zip’
master.zip [ <=> ] 17.56M 24.4KB/s in 12m 33s
2020-07-25 01:20:07 (23.9 KB/s) - ‘master.zip’ saved [18413764]

Now it is necessary to decompress it using unzip. If you don’t have it installed, you have to install it with APT.
sudo apt install unzip
Proceed to decompress the file:
:~$ unzip master.zip
The resulting folder must be moved to the Apache root directory:
:~$ sudo mv yclas-master /var/www/html/yclas
And change the permits so that Apache can handle it properly:
:~$ sudo chmod -R 755 /var/www/html/yclas/
Now change the owner of the yclas folder to www-data
:~$ sudo chown -R www-data:www-data /var/www/html/yclas/
Now create a new Virtualhost for YClas.
:~$ sudo nano /etc/apache2/sites-available/yclas.conf
And add the following content:
<VirtualHost *:80>
ServerAdmin [email protected]
DocumentRoot /var/www/html/yclas
ServerName open.osradar.test
ServerAlias open.osradar.test
        <Directory /var/www/html/yclas/>
              Options FollowSymlinks
              AllowOverride All
              Require all granted
        </Directory>
 ErrorLog ${APACHE_LOG_DIR}/error.log
 CustomLog ${APACHE_LOG_DIR}/access.log combined
</VirtualHost>

Save the changes and close the file.
Remember to replace ServerName and ServerAlias with your domains.
Then, enable the new VirtualHost, Apache’s rewrite module, and restart it.
:~$ sudo a2ensite yclas
:~$ sudo a2enmod rewrite
:~$ sudo systemctl restart apache2
Now, we can complete the installation.
5.- Install Open Classifieds on Ubuntu 20.04
Now it’s time to install Open Classifieds through the program’s web interface. To do this, open your web browser and go to http://your-server and you will see the following:

On that screen, the server will be scanned to verify that it meets the requirements. You can also choose the language of the new site. Then, click on the Start Installation button.
Now, you will have to enter the credentials from the newly created database. You can even specify an alternate host for the database, but this is not our case.

On the next screen, you will have the site configuration. There you can assign a name and create the administrator user.

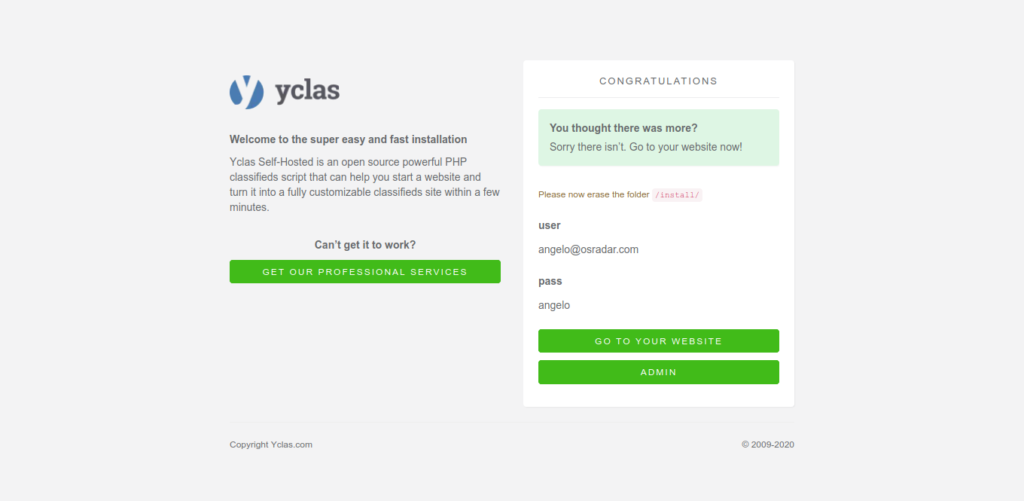
In the end, you will receive a congratulation and you will have two buttons that will take you to the newly created website and the administration panel respectively.
If you choose to go to the administration panel, you will first see the login screen where you will have to enter your credentials:

And finally the administration panel.

So, enjoy it. Open Classifieds is correctly installed.
Conclusion
Open Classifieds is a great tool aimed at providing solutions to companies of many sizes. However, the installation is not complicated at all and we can take advantage of the application to deploy our classified page quickly and easily.
Please share this post with your friends. And join our Telegram Channel.

 on Ubuntu 20.04 We will use the simplest method for it. So, welcome.)