

Hi, folks. This time I will tell you how to install Apache Ant on OpenSUSE 15.2 / 15.1 Recently I have taught you how to do it on Debian, however, OpenSUSE is a very popular distribution that is also used by many Java developers around the world.
Apache Ant
Apache Ant is an application created in Java sponsored by the Apache foundation that allows automating tasks of compilation and construction of projects. As it is made in Java it is common to use it for Java projects.
Thanks to Apache Ant it is possible to save a lot of time in medium size projects. It is similar to the make tool, the difference is that it uses a file called build.xml where you specify the rules that the application will use.
With this in mind, it is very likely that if you develop applications with Java, you will use Ant.
Install Apache Ant on OpenSUSE 15.2 / 15.1
OpenSUSE is becoming more and more popular thanks to the stability it provides. And that pleases many Java developers. For this, we need Java and some other configurations.
Install Java on OpenSUSE 15.2 / 15.1
As Apache Ant is built in Java and its potential is better exploited in Java projects.
So you have to install Java on OpenSUSE 15.2 /15.1 but first, it is recommended to update the system.
So, open a terminal and run it:
:~$ sudo zypper up
This way the system will be updated and with the security patches correctly installed.
Java 11 is available in the official OpenSUSE 15.2 / 15.1 repositories through the OpenJDK project. To check it out, you can run the following command:
:~$ sudo zypper search openjdk
S | Name                             | Summary                            | Type
--+----------------------------------+------------------------------------+-----------
  | java-10-openjdk                  | OpenJDK 10 Runtime Environment     | package
  | java-10-openjdk                  | OpenJDK 10 Runtime Environment     | srcpackage
  | java-10-openjdk-accessibility    | OpenJDK 10 accessibility connector | package
  | java-10-openjdk-demo             | OpenJDK 10 Demos                   | package
  | java-10-openjdk-devel            | OpenJDK 10 Development Environment | package
  | java-10-openjdk-headless         | OpenJDK 10 Runtime Environment     | package
  | java-10-openjdk-javadoc          | OpenJDK 10 API Documentation       | package
  | java-10-openjdk-jmods            | JMods for OpenJDK 10               | package
  | java-10-openjdk-src              | OpenJDK 10 Source Bundle           | package
  | java-11-openjdk                  | OpenJDK 11 Runtime Environment     | package
  | java-11-openjdk                  | OpenJDK 11 Runtime Environment     | srcpackage
  | java-11-openjdk-accessibility    | OpenJDK 11 accessibility connector | package
  | java-11-openjdk-demo             | OpenJDK 11 Demos                   | package
  | java-11-openjdk-devel            | OpenJDK 11 Development Environment | package
  | java-11-openjdk-headless         | OpenJDK 11 Runtime Environment     | package
  | java-11-openjdk-javadoc          | OpenJDK 11 API Documentation       | package
  | java-11-openjdk-jmods            | JMods for OpenJDK 11               | package
  | java-11-openjdk-src              | OpenJDK 11 Source Bundle           | package
  | java-1_8_0-openjdk               | OpenJDK 8 Runtime Environment      | package
  | java-1_8_0-openjdk               | OpenJDK 8 Runtime Environment      | srcpackage
  | java-1_8_0-openjdk-accessibility | OpenJDK 8 accessibility connector  | package
  | java-1_8_0-openjdk-demo          | OpenJDK 8 Demos                    | package
  | java-1_8_0-openjdk-devel         | OpenJDK 8 Development Environment  | package
  | java-1_8_0-openjdk-headless      | OpenJDK 8 Runtime Environment      | package
  | java-1_8_0-openjdk-javadoc       | OpenJDK 8 API Documentation        | package
  | java-1_8_0-openjdk-src           | OpenJDK 8 Source Bundle            | package

So to install it, just run the following command:
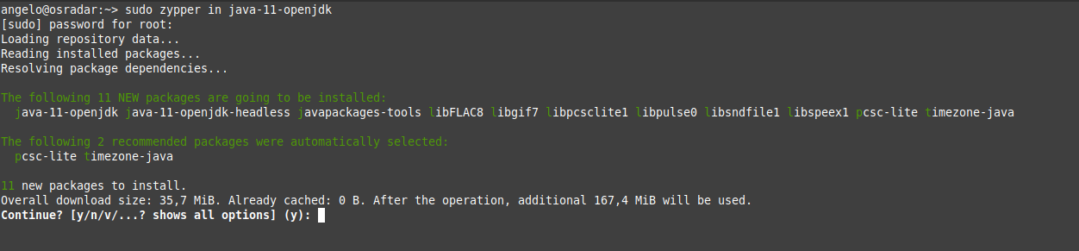
:~$ sudo zypper in java-11-openjdk
Loading repository data...
Reading installed packages...
Resolving package dependencies...
The following 11 NEW packages are going to be installed:
  java-11-openjdk java-11-openjdk-headless javapackages-tools libFLAC8 libgif7 libpcsclite1 libpulse0 libsndfile1 libspeex1 pcsc-lite timezone-java
The following 2 recommended packages were automatically selected:
  pcsc-lite timezone-java
11 new packages to install.
Overall download size: 35,7 MiB. Already cached: 0 B. After the operation, additional 167,4 MiB will be used.
Continue? [y/n/v/...? shows all options] (y):
Finally, check the version of Java installed.
:~$ java --version
openjdk 11.0.6 2020-01-14
OpenJDK Runtime Environment (build 11.0.6+10-suse-lp151.3.12.1-x8664)
OpenJDK 64-Bit Server VM (build 11.0.6+10-suse-lp151.3.12.1-x8664, mixed mode)
Install Apache Ant on OpenSUSE 15.2 / 15.1
Now we can download and install Apache Ant on OpenSUSE 15.2 / 15.1
First locate the temporary folder and from there download with wget.
:~$ cd /tmp/
:~$ wget -c http://mirrors.advancedhosters.com/apache/ant/binaries/apache-ant-1.10.7-bin.tar.gz
--2020-03-26 18:33:15--  http://mirrors.advancedhosters.com/apache/ant/binaries/apache-ant-1.10.7-bin.tar.gz
Resolving mirrors.advancedhosters.com (mirrors.advancedhosters.com)... 213.174.147.249, 2a02:b48:6:1::2
Connecting to mirrors.advancedhosters.com (mirrors.advancedhosters.com)|213.174.147.249|:80... connected.
HTTP request sent, awaiting response... 200 OK
Length: 6874544 (6,6M) [application/octet-stream]
Saving to: ‘apache-ant-1.10.7-bin.tar.gz’
apache-ant-1.10.7-bin.tar.gz 100%[=====================================================================================>] 6,56M 347KB/s in 22s
2020-03-26 18:33:37 (311 KB/s) - ‘apache-ant-1.10.7-bin.tar.gz’ saved [6874544/6874544]

Once the download is complete, unzip it and move it to /usr/local/
:~$ tar -xvf apache-ant-1.10.7-bin.tar.gz
:~$ sudo mv apache-ant-1.10.7/ /usr/local/ant
That’s enough to use it. However, it is a good idea to modify the bash profile so that Apache Ant is available from any directory and not from where it is copied.
So modify the profile configuration file:
:~$ sudo nano /etc/profile
And add the following to the end of the file:
ANT_HOME="/usr/local/ant"
PATH="$PATH:/usr/local/ant/bin"
export ANT_HOME
export PATH

Apply the changes with the following command:
:~$ source /etc/profile
Testing the installation
Now that Apache ant is installed we will do two tests to check that it works.
The first one will be to choose any directory and execute the command ant
:~$ ant
And you will have a screen output like this:
Buildfile: build.xml does not exist!
Build failed

If this is so, Ant is working well. Remember that apache Ant requires a build.xml file to perform the processes. This error indicates that ant is working, it just can’t find the file.
Finally, you can check the installed version:
:~$ ant -version
Apache Ant(TM) version 1.10.7 compiled on September 1 2019
So, Ant is ready to be used.
Conclusion
In this post you have learned how to install Apache Ant on OpenSUSE quickly and easily. Also with this method you will always have the latest stable version.
Please share this post with your friends and join our Telegram channel.
