

An FTP server, although for many it can be a bit old-fashioned, is quite useful. Especially in computer networks where you need to share files internally. Or even if we are in a house with several computers, it would also be useful. Best of all, it is still easy to set up one and more on FreeBSD 12. So in this post, you will learn how to set up vsftpd on FreeBSD 12.
Set up vsftpd on FreeBSD 12
Before starting with this installation, it is convenient to have sudo enabled for your regular user. It is not mandatory, but this will avoid working directly with the root user.
So, read our post about it:
How to enable sudo on FreeBSD 12?
We will also have to install the nano text editor to make file editing easier:
:~$ sudo pkg install nano
With this, we’ll be able to work quietly.
1.- Install vsftpd on FreeBSD 12
First, you need to install vvsftpd on FreeBSD 12.
So, open the terminal and navigate to the folder where the port is.
:~$ cd /usr/ports/ftp/vsftp
Then, install it with the following command:
:~$ sudo make install clean

During the installation process, you will see a screen as in the image above. You can leave everything as it is.
At the end of the installation, you will see an image similar to this:

Now install another port to increase the security of vsftpd.
:~$ cd /usr/ports/security/pam_pwdfile
:~$ sudo make install clean
===>  Staging for pam_pwdfile-1.0
===>   Generating temporary packing list
install  -s -o root -g wheel -m 444   -S  pam_pwdfile.so /usr/ports/security/pam_pwdfile/work/stage/usr/local/lib/
====> Compressing man pages (compress-man)
===>  Installing for pam_pwdfile-1.0
===>  Checking if pam_pwdfile is already installed
===>   Registering installation for pam_pwdfile-1.0
Installing pam_pwdfile-1.0...
===>  Cleaning for pam_pwdfile-1.0
As in the vsftpd installation, you will see an image where you can add a feature or not. Just keep it as it is.

To authenticate vsftpd users correctly, we have to add some lines to a pam.d configuration file
:~$ sudo nano /etc/pam.d/vsftpd
auth required /usr/local/lib/pam_pwdfile.so pwdfile /usr/local/etc/vsftpd_login.db
account required /usr/lib/pam_permit.so

Save the changes and close the file.
2.- Configuring vsftpd to work properly
Once vsftpd is installed, you have to make settings so you can start and work properly.
First of all, you have to create a new user on the system so you can use the server.
:~$ sudo adduser -v
And then, complete the information with the values you want.
Username: angeloftp
Full name: angelo
Uid (Leave empty for default):
Login group [angeloftp]:
Login group is angeloftp. Invite angeloftp into other groups? []:
Login class [default]:
Shell (sh csh tcsh nologin) [sh]: nologin
Home directory [/home/angeloftp]:
Home directory permissions (Leave empty for default):
Use password-based authentication? [yes]:
Use an empty password? (yes/no) [no]:
Use a random password? (yes/no) [no]:
Enter password:
Enter password again:
Lock out the account after creation? [no]:
Username   : angeloftp
Password   : *****
Full Name  : angelo
Uid        : 1003
Class      :
Groups     : angeloftp
Home       : /home/angeloftp
Home Mode  :
Shell      : /usr/sbin/nologin
Locked     : no
OK? (yes/no): yes
adduser: INFO: Successfully added (angeloftp) to the user database.
Add another user? (yes/no): no
Goodbye!

So, you can modify the user and password parameters. The rest you can keep the same.
Now, let’s modify the vsftpd configuration file. In this file are all the settings we can have. Before modifying it, let’s make a backup of it:
:~$ sudo mv /usr/local/etc/vsftpd.conf /usr/local/etc/vsftpd.conf.bak
And now, yes, you proceed to modify it:
:~$ sudo nano /usr/local/etc/vsftpd.conf
In my case, the configuration that works for me without problems is the following:
anonymous_enable=NO
anon_upload_enable=NO
anon_mkdir_write_enable=NO
local_enable=YES
write_enable=YES
listen_port=21
dirmessage_enable=YES
xferlog_enable=YES
connect_from_port_20=YES
xferlog_file=/var/log/vsftpd.log
xferlog_std_format=YES
secure_chroot_dir=/usr/local/share/vsftpd/empty
max_clients=200
max_per_ip=100
chroot_local_user=YES
text_userdb_names=YES
force_dot_files=NO
anon_root=/home/ftp
async_abor_enable=YES
use_localtime=YES
listen=YES
background=YES
allow_writeable_chroot=YES

Of course, this is an example. You can always explore other options and for that we refer you to the vsftp official documentation.
Again, save the changes and close the file.
Now you have to add users to vsftpd, but first you have to create the file where the users and their passwords will be. To do this, we’ll use a tool called htpasswd. And use this command:
:~$ sudo htpasswd -c -b /usr/local/etc/vsftpd_login.db [username] [password]
Changes the permissions of the created file:
:~$ sudo chmod 0600 /usr/local/etc/vsftpd_login.db
In username and password replace it with the user we created earlier.
In case htpasswd is not available, you can get it by installing the apache web server.
:~$ sudo pkg install apache24
Updating FreeBSD repository catalogue...
FreeBSD repository is up to date.
All repositories are up to date.
The following 8 package(s) will be affected (of 0 checked):

New packages to be INSTALLED:
	apache24: 2.4.41
	libnghttp2: 1.40.0
	libxml2: 2.9.10
	expat: 2.2.8
	pcre: 8.43_2
	apr: 1.7.0.1.6.1
	gdbm: 1.18.1_1
	db5: 5.3.28_7

Number of packages to be installed: 8

The process will require 92 MiB more space.
20 MiB to be downloaded.

Proceed with this action? [y/N]:
If you want to add new users, you can do it with the following command:
:~$ sudo htpasswd -b /usr/local/etc/vsftpd_login.db USERNAME PASSWORD
Configure vsftpd to start with the system by editing the following file
:~$ sudo nano /etc/rc.conf
And in it he adds the following:
vsftpd_enable="YES"
Finally, the vsftpd service starts.
:~$ sudo /usr/local/etc/rc.d/vsftpd start
Now the creature is alive.
Access to the FTP server
Now that the service is working, we have to test it. Open your favorite web browser and go to ftp://server-ip.
First you will need to enter your username and password and then you will see the following:

You can also use a graphic client on your computer like Filezilla.
Add a new connection and type in your credentials:
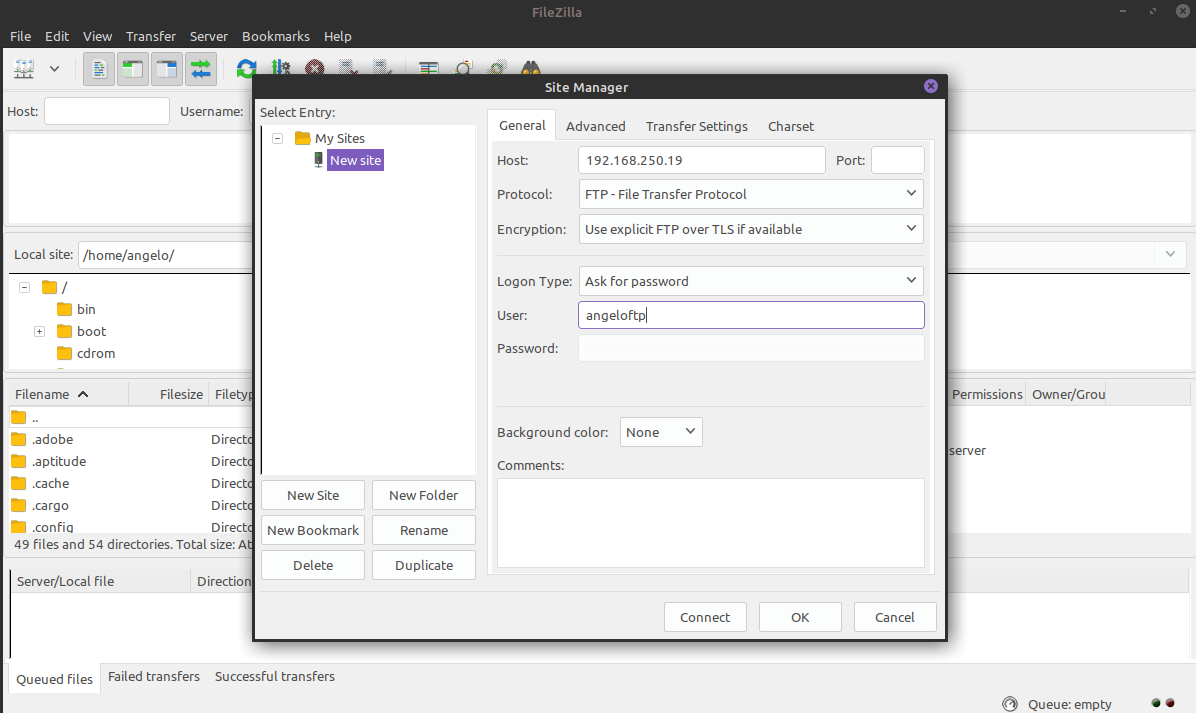
After accepting the connection and entering the password, it will connect. And as you can see, everything has been successful:

So, everything’s in order.
Conclusion
An FTP server on FreeBSD can be a secure alternative for sharing files on a network. It is as easy to set up as you have seen it today.
Please share this post and join our Telegram channel.

There’s a typo in step 1:
:~$ cd /usr/ports/ftp/vsftp
should be
:~$ cd /usr/ports/ftp/vsftpd
Also you don’t need to do any of the PAM stuff
as long as you use local users.
Otherwise a good guide
It's a really nice guide
But I had authentication problem. After a few days I found a solution.
I had to add a encryption option in the htpasswd command. I chose -B to use bcrypt for encryption.
so my command looks like this: sudo htpasswd -b -B /usr/local/etc/vsftpd_login.db USERNAME PASSWORD
Maybe it helps some people x)