

Ubuntu 20.04 is a very popular distribution on servers because it is quite stable and offers commercial support. That is why it is necessary to learn how to install administrative tools. So, in this post, you will learn how to install GLPI on Ubuntu 20.04. This French inventory system also allows you to have a ticketing system that will allow you to give technical support in your organization in an orderly way.
According to Wikipedia:
“GLPI is an open source IT Asset Management, issue tracking system and service desk system (..) The solution is able to build an inventory of all the organization’s assets and to manage administrative and financial tasks”
It is open source because it is released under the GPLv2 license which makes it accessible to many. Moreover, it is perfectly compatible with many operating systems.
So, let us start the job.
Install GLPI on Ubuntu 20.04
1.- Install LAMP on Ubuntu 20.04
One of the main advantages of using and installing GLPI is that it is a web application, and is therefore compatible with many operating systems. Also, the installation is not complicated at all, but it requires that the LAMP stack is installed and working on the server.
So let’s get to work on this first.
How to install LAMP on Ubuntu 20.04?
Also, you have to install other PHP modules that become necessary. These are all of them:
php7.4 php7.4-curl php7.4-zip php7.4-gd php7.4-intl php-pear php7.4-imagick php7.4-imap php-memcache php7.4-pspell php7. 4-tidy php7.4-xmlrpc php7.4-xsl php7.4-mb php7.4-ldap php-cas php-apcu libapache2-mod-php7.4 php7.4-mysql
Once it is installed and correctly configured we can move on to GLPI.
2.- Creating the new user and database for GLPI
With MariaDB already working properly, we now have to create a new user and a new database.
The main reason for this is that GLPI needs to store different data and it is convenient that the root user is not the user that GLPI is going to use. This is for security reasons.
So, open the MariaDB console as the root user:
:~$ sudo mysql -u root -p
And then, create the database, the new user together with the privileges over the new database.
> CREATE DATABASE glpidb;
>GRANT ALL PRIVILEGES ON glpidb.* TO 'glpiuser'@'localhost' IDENTIFIED BY 'password';
> FLUSH PRIVILEGES;
>EXIT;

Remember that you can change the values set here to your own. Above all, the password has to be a strong one and must be safe.
3.- Download GLPI on Ubuntu 20.04
So, it’s time to download GLPI using the wget command. This will make the download faster and we’ll still be in a CLI environment.
Navigate to the /tmp/ folder and download it from there.
:~$ cd /tmp/
:~$ wget -c https://github.com/glpi-project/glpi/releases/download/9.4.5/glpi-9.4.5.tgz
Once the download is complete, decompress the file with the tar command.
:~$ tar -xvf glpi-9.4.5.tgz
Then, move it to the Apache root folder in Ubuntu and assign the correct permissions.
:~$ sudo mv glpi /var/www/html/
:~$ sudo chmod 755 -R /var/www/html/
And to make sure Apache has no problem running all GLPI, make Apache the owner of the folder.
:~$ sudo chown www-data:www-data -R /var/www/html/
After this, create a new Virtualhost for GLPI.
:~$ sudo nano /etc/apache2/sites-available/glpi.conf
And add the following content to the file:
<VirtualHost *:80>
   ServerAdmin admin@your_domain.com
   DocumentRoot /var/www/html/glpi
   ServerName your-domain.com

   <Directory /var/www/html/glpi>
        Options FollowSymlinks
        AllowOverride All
        Require all granted
   </Directory>

   ErrorLog ${APACHE_LOG_DIR}/your-domain.com_error.log
   CustomLog ${APACHE_LOG_DIR}/your-domain.com_access.log combined

</VirtualHost>

Replace the value “your-domain” with your own. You are also free to add new rules for this Virtualhost.
Then save the changes and close the text editor.
To enable the new Virtualhost, simply make a symbolic link from the file to the Apache-enabled sites.
:~$ sudo ln -s /etc/apache2/sites-available/glpi.conf /etc/apache2/sites-enabled/glpi.conf
Then, enable Apache’s rewrite module and apply the changes by restarting Apache.
:~$ sudo a2enmod rewrite
:~$ sudo systemctl restart apache2
Now to complete the installation.
4.- Install GLPI on Ubuntu 20.04
Now open a web browser and go to http://your-domain and you will see the following screen where you can choose the installation language:

Then, you will have to accept the license terms:

In the next screen, you will have to specify if it is a new installation or an upgrade. In this case, it is a new installation:

Then, the wizard will verify that the server meets all the requirements.

Now you will see the first step of the installation which is to configure the database credentiials. Just type the previously created credentials:

Then, select the database created and continue the process:

If the installer manages to connect to the database, you will be informed on this screen:

GLPI is an open-source and improved by the community. Therefore you will be asked if you want to anonymously send statistics to the developers:

Then, on the next screen, you will be informed that the installation was successful and you will see the default credentials for each GLPI role. Remember that you can change this.

In the end, you will see the Login screen where you will enter the necessary credentials:

Finally, you will see the main screen of the application and it will be ready for work.
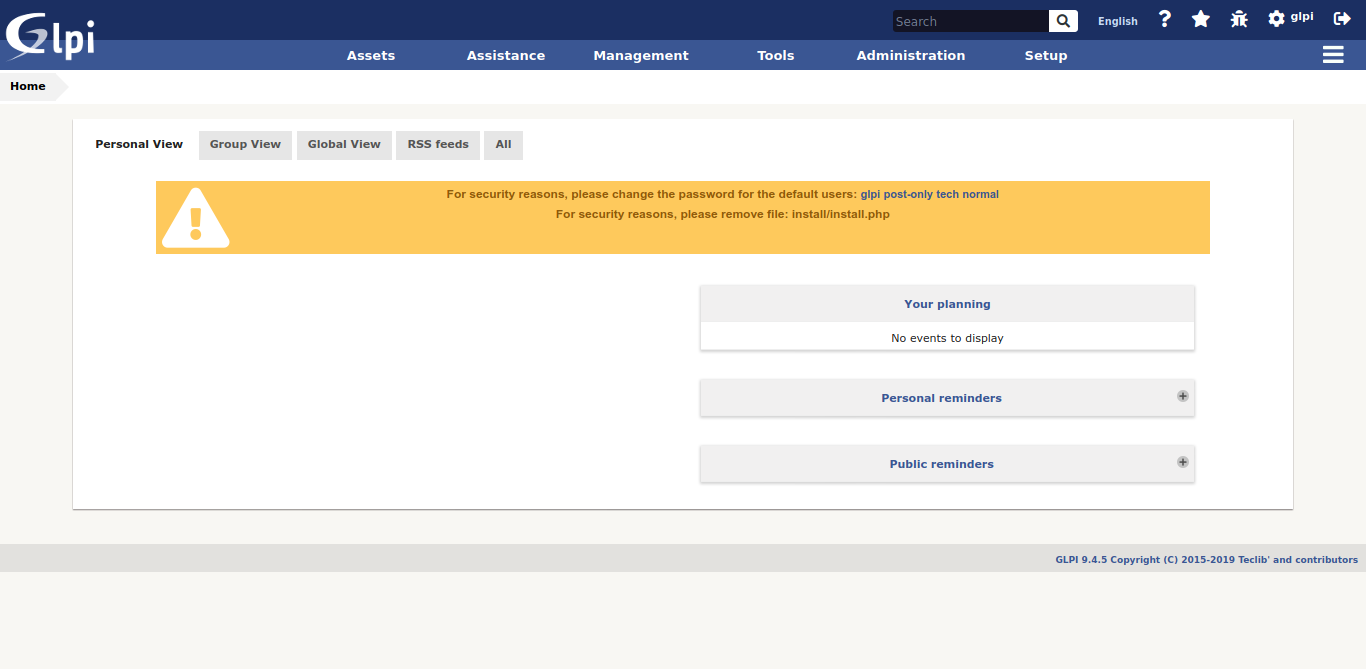
So, enjoy it.
Conclusion
GLPI is an application to control the informatics equipment of your company. It is an administrative tool, more than anything. It is created in PHP and uses MariaDB as a database manager.
We are talking about a solid tool used by many organizations worldwide. Free is not a problem for small projects but it is solid enough to be used in larger ones
Please share this post and join our Telegram channel.
