
Today, we are going to learn that How To Install Cacti Monitoring Server on Debian 10 with Nginx. Cacti is a Monitoring server along with the network graphing solution specially designed to harness the power of RRDTool’s data storage & graphics functionality. You can find the more about Cacti from any search engine. In short, Cacti is well maintained Server for the LAN networks to the complex ones. So, here we we learn that how we can install Cacti on our Debian System.
Step 1: Update System
As usual, update your system by
sudo apt udpate
Step 2:Install Required Packages
Install the dependency packages required for cacti if they are not present before.
sudo apt install software-properties-common
sudo apt install nginx
sudo apt install curl vim acl composer fping git graphviz imagemagick mariadb-client mariadb-server mtr-tiny nginx-full python-memcache python-mysqldb snmp snmpd whois php-snmp rrdtool librrds-perl
Step 3: Install PHP & PHP extensions
Type the given command to install PHP & its required extensions
sudo apt -y install php php-common
sudo apt -y install php-cli php-fpm php-json php-pdo php-mysql php-zip php-gd  php-mbstring php-curl php-xml php-pear php-bcmath php-gmp php-ldap
Step 4: Database Configuration
Configure the database as we’ve installed it in step 2.
sudo systemctl enable mysql
sudo systemctl restart mysql
sudo mysql -u root -p
Create Database & User for Cacti
Create a database with name cacti as the demo data also contain database with cacti name. To make our work easier create with cacti name.
CREATE DATABASE cacti;
CREATE USER 'cactiuser'@'localhost' IDENTIFIED BY 'Your_password';
GRANT ALL PRIVILEGES ON cacti.* TO 'cactiuser'@'localhost';
FLUSH PRIVILEGES;
EXIT
Now, give the Cacti user access to the MySQL Timezone Database.
sudo mysql -u root -p mysql < /usr/share/mysql/mysql_test_data_timezone.sql
Then login to the MariaDB
sudo mysql -u root -p
Give Permissions to the cacti user.
GRANT SELECT ON mysql.time_zone_name TO cactiuser@localhost;
 ALTER DATABASE cacti CHARACTER SET = 'utf8mb4'  COLLATE = 'utf8mb4_unicode_ci'
 flush privileges;
 exit
Then open the below file & scroll to the [mysqld] section
sudo vim /etc/mysql/mariadb.conf.d/50-server.cnf
And then do the changes as below:
[mysqld]
 ……..
 collation-server = utf8mb4_unicode_ci
 character-set-server  = utf8mb4
 max_heap_table_size = 128M
 tmp_table_size = 64M
 join_buffer_size = 64M
 innodb_file_format = Barracuda
 innodb_large_prefix = 1
 innodb_buffer_pool_size = 1GB
 innodb_buffer_pool_instances = 10
 innodb_flush_log_at_timeout = 3
 innodb_read_io_threads = 32
 innodb_write_io_threads = 16
 innodb_io_capacity = 5000
 innodb_io_capacity_max = 10000
After it restart the MariaDB services.
sudo systemctl restart mysql
Step 5: Configuring PHP FPM
Change the timezone to your’s in php.ini file.
sudo nano /etc/php/7.3/fpm/php.ini
Scroll to the [Date] section & add your timezone without comment.
sudo nano /etc/php/7.3/cli/php.ini
Here also set the above timezone.
And then restart PHP-FPM services
sudo systemctl restart php7.3-fpm
Step 6: Configuring Nginx Server
Nginx web server is the recommended one. You can choose your desired one. As we’ve selected the Nginx so we’ll go through its configuration.
First of all remove the default page of Nginx
sudo rm /etc/nginx/sites-enabled/default
Then create a new file
sudo nano /etc/nginx/conf.d/cacticonfig.conf
And add the below content.
server {
  listen      80;
  server_name example.com;
  root        /var/www/html;
  index       index.php;
  access_log  /var/www/html/log/cactiacess.log;
  error_log   /var/www/html/log/cacti.log;
  charset utf-8;
  gzip on;
  gzip_types text/css application/javascript text/javascript application/x-javascript image/svg+xml text/plain text/xsd text/xsl text/xml image/x-icon;
  location / {
    try_files $uri $uri/ /index.php?$query_string;
   }
   location /api/v0 {
    try_files $uri $uri/ /api_v0.php?$query_string;
   }
   location ~ .php {
    include fastcgi.conf;
    fastcgi_split_path_info ^(.+.php)(/.+)$;
    fastcgi_pass unix:/var/run/php/php7.3-fpm.sock;
   }
   location ~ /.ht {
    deny all;
   }
  }
Restart the Nginx services.
sudo systemctl restart nginx
Step 7: Installing Cacti
Go to the latest Cacti release & download it
curl -O https://www.cacti.net/downloads/cacti-latest.tar.gz
Extract the downloaded package
tar -zxvf cacti-latest.tar.gz
Then move the files to the web root directory & then change the name of the directory.
sudo mv cacti-1* /var/www/html/
sudo mv /var/www/html/cacti-*/ /var/www/html/cacti
After it change the ownership
sudo chown -R www-data:www-data /var/www/html
Now, import the default Cacti Data.
sudo mysql -u root -p cacti < /var/www/html/cacti/cacti.sql
Edit the Cacti Configuration file
sudo vim /var/www/html/cacti/include/config.php
And set the database info.
$database_type = "mysql";
 $database_default = "cacti";
 $database_hostname = "localhost";
 $database_username = "cactiuser";
 $database_password = "your_password";
 $database_port = "3306";
 $database_ssl = false;
Replace the username cactiuser & password with your’s.
After it restart the nginx.
sudo systemctl restart nginx.
Step 8: Edit crontab file
Edit the crontab file and add the following to it.
$ sudo nano /etc/cron.d/cacti
 */5 * * * * www-data php /var/www/html/cacti/poller.php > /dev/null 2>&1
Step 9: Cacti Dashboard
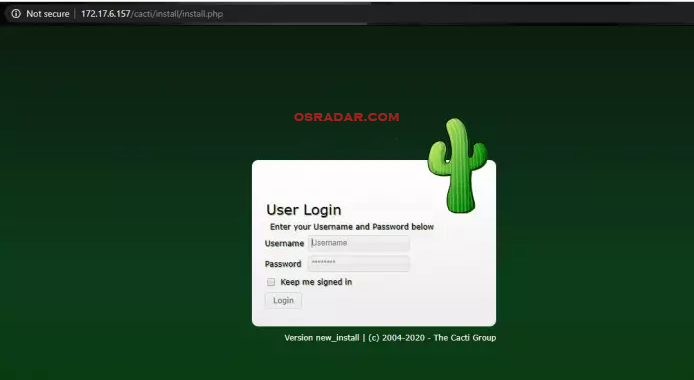
Go to the web installer & follow the instructions by visiting http://IP
Enter the default credentials as admin for username & password.
Change your password to stay secure.

Accept the Licence Agreement & click on Begin.

Choose the mode as dark or default & hit Begin.

If all the requirements are properly configured you’ll see the following screen. Then click Next if all gives a green thumbs up.

Click Next.
Select your Installation type & hit Next.

After Directory Permissions checks. Hit Next.

Click Next to accept the directories to store the binary files of cacti.

And then read the Statement carefully & proceed to Next.

Select default profiles for poller & networks.

Select the templates & click Next.

It will do the Configuration checks. When finished, just hit Next.

Now, confirm the installation by checking the radio button & then click on Install to start the Installation process.

Wait until Installation is complete.

When done, do refresh the page & you’ll see the login page. Provide your username & password to go to the dashboard.

You are here to the dashboard.

So, that’s how we have Installed & Configured Cacti Server on Debian 10.
