

DNS over HTTPS is an Internet protocol that allows you to add a layer of security. It is also based on HTTPS and is known as DoH. Its main function is to improve privacy and security when browsing the Internet. However, it is best to define what DNS is. Next, we will see how to enable DNS over HTTPS in Windows 11 so that it works by default without the need to do it manually in the browser. The process only takes a few seconds. Moreover, you only have to do it once from the Windows 11 computer. Just go to the system settings. You also need to know which DNS you want to use as a favorite or which one as an alternative. Subsequently, you just have to configure it. Let’s see how to enable DNS over HTTPS in Windows 11.
What is a DNS?
Let’s start at the beginning. DNS stands for Domain Name System. Its mission is to translate domain names into associated binary identifiers or IP addresses. In other words, DNS allows you to type the name of a network (example: osradar.com) when in reality you would have to access an IP address. Imagine how cumbersome it would be to have to memorize the IPs of the websites you want to access. In short, DNS translates domain names thanks to a distributed and hierarchical database.

There is no single DNS. We generally use the DNS provided by the operator. However, there are alternative DNS from Google, Cloudfare and others. The different options have additions such as more speed, security or more reliability. And these DNS are what we need to know when activating the DoH function in Windows 11. Our provider offers a default DNS configuration. However, we can change it for other alternatives. Furthermore, these other options give more speed, reliability, stability and more security. Some allow access to parental control, allow skipping blocking of some websites, or even offer protection against phishing. There are many options to choose from. Consequently, we just need to know the advantages and disadvantages of each provider.
Some popular DNS are:
- Google (8.8.8.8/8.8.4.4).
- Cloudflare (1.1.1.1/1.0.0.1)
- OpenDNS Home (208.67.222.222/208.67.220.220)
However, there are many other options. You can consult a list of the best DNS for Windows here.
How to Enable DoH in browsers
We can easily activate DoH in browsers. Either in Firefox, Chrome, or Edge. With Windows 11, we will also be able to activate it in the web browser. As a result, we will surf the Internet with more privacy and security. Regarding Chrome and Edge, the steps are simple: just type chrome://flags/#dns-over-https in the browser’s search bar, and it will automatically take us to the Flags section. Once there, you will see a series of enabled and disabled options. Just look for the one that says Secure DNS lookups. Next to it, a drop-down menu where we will have to choose Enabled to activate DNS over HTTPS.
How to Enable DNS over HTTPS in Windows 11
As we have seen previously, we can activate it from the different browsers. However, it is more convenient to activate it by default. That is to say, that it is a unique and general configuration for any installed browser. In this way, we will not only improve the security and privacy of connections in web browsers. In fact, we will also increase this aspect in the connections of the computer connected to the network. Let’s take a look at the steps to follow.
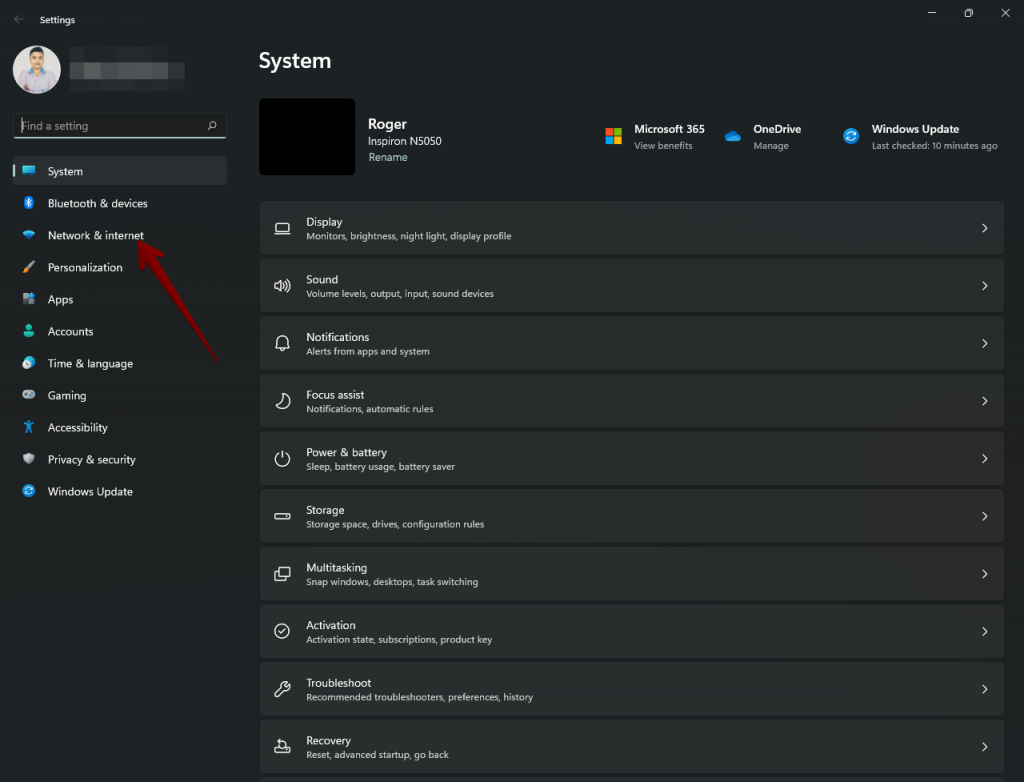
- Press the Win+I combination to go to Windows Settings. Once there, click on Network & Internet.
- Next, click on the type of network you are currently connected to. In my case, I connect via wireless, so I click on Wi-Fi. However, depending on your situation, you could also click on Ethernet.

- Consequently, we will see a series of sections related to the available networks. In fact, from here we will be able to manage the networks. However, the option that interests us is Wi-Fi Properties. Just click there.

Editing DNS values
In this new window, we will see the properties of the specific connected network. We will also be able to modify aspects such as IP assignment or manage the network type. However, the option that interests us is the DNS server assignment. Consequently, click on Edit.

In the new screen, please change the setting from automatic to manual.


As you can see, there are a couple of switches corresponding to IPV4 and IPV6. Therefore, you have to activate them to start the configuration. Now you just have to fill in the Preferred DNS and Alternate DNS values. At this point, you just have to choose one from the list we referred to above. You can apply the parameters to both connection types.

However, the step that interests us is the one related to DoH. Well, we have to edit the preferred DNS encryption field. You must select Encrypted only (DNS over HTTPS).


Back to the previous screen, you can see the new values already set.

How to change it in Windows 10
If you have Windows 10 the steps are also elementary. In the same way, they are done from Windows Settings, specifically from the Wi-Fi or Ethernet section.
- We open the configuration of our computer
- Go to the Settings, Network, and Internet section.
- In the menu on the left, choose Status
- Here you will see your current network you are connected to.
- You will see the Properties button and Data usage.
- Click on Properties.
You will access a window with general information about the network. In fact, we will see information about the network profile, the metered usage connection, etc. Please click on the IP Configuration. From here on, just repeat the steps mentioned above. That is, in the same way as for Windows 11.
Okay, so ultimately we have seen how to enable DNS over HTTPS in Windows 11. Privacy and security is a major concern for many users. Consequently, you can take these tips to increase it. See you soon!
