

Today we are going to learn that how to install Neat IP Address Planner on Ubuntu (NIPAP). Let’s have a short introduction on Neat IP Address Planner.
What is NIPAP?
NIPAP is an open source and powerful IP address with management machine built to efficaciously take care of big quantities of ip addresses in small to big groups. NIPAP comes with a graceful and intuitive web based control dashboard for network engineers and sysadmins to use. The net interface also functions as an effective google-style search, however a CLI patron is also supplied for terminal concentric customers.
Salient Features of NIPAP
Following are the some salient features of NIPAP
- Very rapid and scalable to hundreds of thousands of prefixes.
- A fashionable and intuitive net interface.
- Local support for IPv6 (full characteristic parity with IPv4)
- CLI for the hardcore user
- Native VRF guide, allowing overlapping prefixes in unique VRFs
- Guide for documenting single hosts
- Very effective search function (by using regexp)
- Records over used and available addresses
- Included audit log
- IP address with request machine for mechanically assigning suitable prefixes
- XML-RPC middleware, permitting easy integration with different programs or writing
- Flexible authentication the use of SQLite and/or LDAP
Client Libraries for Python, Java & Oracle are available if you want to integrate it with other systems grammatically.
How To Install Neat IP Address Planner on Ubuntu 18.04
As the NIPAP pre-built packages are officially provided for Ubuntu. So, here’s the procedure you may follow to start with.
Step 1: Add NIPAP repository
Add the NIPAP repository.
sudo apt update
sudo apt -y install gnupg2
echo "deb http://spritelink.github.io/NIPAP/repos/apt stable main extra" | sudo tee /etc/apt/sources.list.d/nipap.list
Then add the NIPAP public key for authentication purposes.
wget -O - https://spritelink.github.io/NIPAP/nipap.gpg.key | sudo apt-key add -
After the repository added successfully, update your package lists.
sudo apt -y update
Step 2: Install PostgreSQL & IP4R extension
Run the below command to install the PostgreSQL & ip4r packages.
sudo apt update
sudo apt install postgresql-contrib postgresql-10-ip4r
Step 3: Installing NIPAP on Ubuntu 18.04
Following packages are available
- nipapd
- nipap-common
- python-pynipap
- nipap-cli
- python3-pynipap
- nipap-www
Now, install the standard packages by running & press Y to continue.
sudo apt install nipapd nipap-cli nipap-www python-pynipap
When prompt provide the required details as
DB server = localhost

Auto set the DB

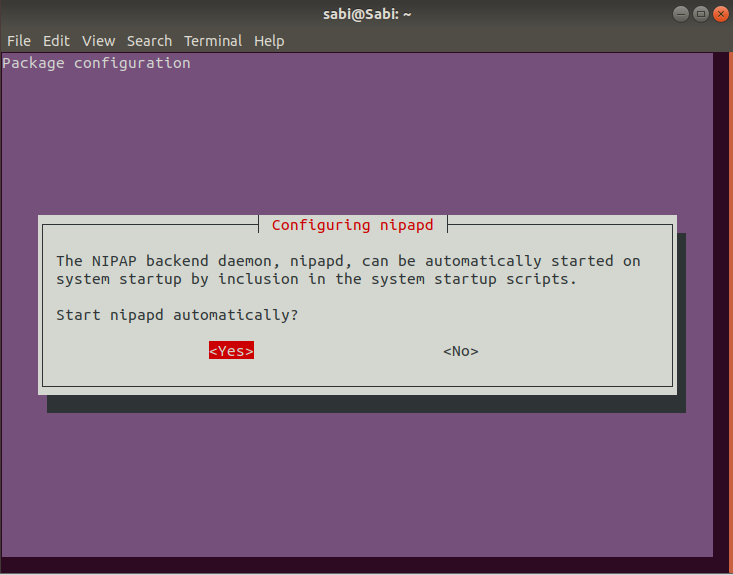
Auto Start the service

And accept the creation of user for web interface.

Step 4: Configuring NIPAP Web UI
As the web UI requires its own account to authenticate at back-end & be sure that it is trusted account. Create it by typing
user="nipap-www"
password="StrongPassw3rd"
sudo nipap-passwd add --username $user --password $password --name "My User Account"
Output:
You’ll see the similar output.

Now, configure the web UI to use this account.
sudo vim /etc/nipap/nipap.conf
xmlrpc_uri = http://nipap-www@local:[email protected]:1337
Here’s the config syntax
xmlrpc_uri = http://{{NIPAPD_USERNAME}}@local:{{NIPAPD_PASSWORD}}@{{NIPAPD_HOST}}:{{NIPAPD_PORT}}
Then restart the nipapd services
sudo systemctl restart nipapd.service
You can also add other users by using the above method.
nipap-passwd add --username myuser --password mypassword --name "my user"
Serving the web UI with Apache httpd with mod_wsgi
Fire the command to get install Apache httpd with mod_wsgi & press Y to continue.
sudo apt install apache2 libapache2-mod-wsgi
Add the new Virtual Host
sudo vim /etc/apache2/sites-enabled/nipap.conf
After adding file modify it and paste the given data into it.
<VirtualHost *:80>
       ServerName nipap.example.com
       DocumentRoot /var/cache/nipap-www/
       ServerAdmin [email protected]
       WSGIScriptAlias / /etc/nipap/www/nipap-www.wsgi

<Directory /etc/nipap/www/>
     Require all granted
  </Directory>

<Directory /var/cache/nipap-www/>
     Require all granted
 </Directory>
 ErrorLog ${APACHE_LOG_DIR}/nipap_error.log
 CustomLog ${APACHE_LOG_DIR}/nipap_access.log combined
</VirtualHost>
Then enable wsgi mod in Apache
sudo a2enmod wsgi
Validate your Apache Configuration
sudo apachectl configtest
Then the web server needs to be able to write to its cache & then alter the permissions.
sudo chown -R www-data:www-data /var/cache/nipap-www

sudo chmod -R u=rwX /var/cache/nipap-www
Then, restart the Apache httpd server.
sudo systemctl restart apache2
Make sure that the NIPAP web UI is up & running and it is also accessible on configured domain nipap.example.com.

Now, provide your credentials to login to the dashboard.

You can add Network prefixes from here or you can also use CLI to add prefixes.
How to add Network prefixes from CLI?
First of all, add a new user for CLI.
sudo nipap-passwd add --username nipap-cli --password StrongPassword --name "My CLI user"
After it create, new .nipaprc file along with the above credentials for CLI user provided.
$ vim ~/.nipaprc
[global]
 hostname = localhost
 port     = 1337
 username = *nipap-cli*
 password = *StrongPassword*
 default_vrf_rt = none
 default_list_vrf_rt = all
Allow the file permissions.
chmod 0600 ~/.nipaprc
You’ve all done, now test it to confirm that it’s working
$ sudo nipap address add prefix 192.168.20.0/24 type assignment description "Test prefix"
Network 192.168.20.0/24 added to VRF 'default' [RT: -]: Test prefix
Now, look at the UI Dashboard to make it sure it works.

So, this is how you can install & configure NIPAP on your Ubuntu system.

 on Ubuntu 18.04. Step 1: Add NIPAP repository. Step 2: Install PostgreSQL & IP4R extension...)
I am accessing my ubuntu server through CLI, how can i access NIPAP UI using any other system?
Because I can’t access it using URL nipap.example.com