

Today we are going to learn that how to install Ralph Assest Management System on Ubuntu 18.04.
Ralph is an Open Source, full-featured Asset Management, DCIM and CMDB gadget for records facilities and back offices. It is launched under Apache v2.0 License. Ralph allows you to preserve track of Assets purchases and control the complete property life cyle, each within the office and Data Center. So, in this tutorial we will cover the installation and configuration of Ralph Asset Management System on Ubuntu 18.04. Just follow the below steps.
Step 1: Update your system
As usually we do, update & upgrade your system to install the new package Ralph Asset Management System on Ubuntu 18.04.
sudo apt update && sudo apt -y upgrade
Step 2: Add Ralph Repositories
After the updating of system move forward to add the Ralph Repositories to Install the packages which are needed. Run the following command with root privileges to add the repositories.
sudo apt-key adv --keyserver  hkp://keyserver.ubuntu.com:80 --recv-keys E2D0F3764B54797F
sudo sh -c "echo 'deb https://dl.bintray.com/allegro/debng bionic main' >  /etc/apt/sources.list.d/ralph.list"
Step 3: How To Install Ralph on Ubuntu 18.04
As you have already added repositories of Ralph Asset Management System, simply fire the following command to install the Ralph along with MySQL Database packages.
sudo apt udpate
sudo apt install mysql-server nginx ralph-core
After running the command you’ll see the prompt appearing to choose the input Ralph database settings or you can use the pre-defined default settings.

These settings could be view from /etc/ralph/conf.d/database.conf. You can later review them or even change/update them.
Step 4: Configure Database & Ralph
Type the given command to access the database server console.
sudo mysql -u root -p
When prompted for password, hit Enter if there’s no password. Then move towards the creating of database & user for Ralph Asset Management System.
CREATE DATABASE ralph;
 CREATE USER 'osradar'@'localhost' IDENTIFIED BY 'Your_Password';
 GRANT ALL PRIVILEGES ON ralph.* TO 'osradar'@'localhost';
 FLUSH PRIVILEGES;
 QUIT;
To use the separate password, go to the /etc/ralph/conf.d/database.conf file and update the password.
Now, test the database if it is working fine.
mysql -u ralph_ng -pralph_ng
Then create the database schema by
sudo ralphctl migrate

Wait until the process completed and then, create the Ralph Superuser
sudo ralphctl createsuperuser

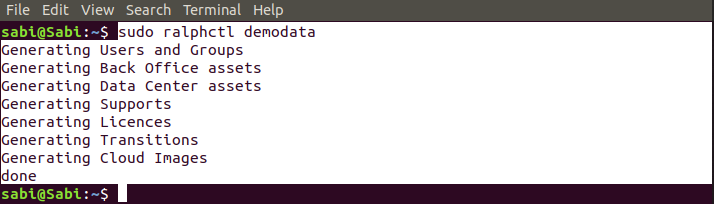
Then import the demo data to populate the database with some data.
sudo ralphctl demodata
Step 5: Start & Enable Ralph services
It’s time to start the Ralph Services.
sudo ralphctl sitetree_resync_apps
sudo systemctl enable ralph.service
sudo systemctl start ralph.service
Make sure that the status is working by hitting
systemctl status ralph.service

Also check that the service is bind to port 8000.
sabi@Sabi:~$ ss -tunelp | grep 8000
 tcp    LISTEN   0        128               0.0.0.0:8000           0.0.0.0:*      uid:123 ino:64171 sk:c <->
Step 6: Nginx Proxy Configuration
Here we will configure the Nginx Proxy to access the Ralph dashboard because here SSL will be terminated. So, you can easily access the Ralph through Nginx Proxy. To do this make a new Nginx configuration file.
sudo nano /etc/nginx/conf.d/ralph.conf
Then paste the following data to the file.
 server {


  listen 80;
 client_max_body_size 512M;
 server_name ralph.example.com;
 proxy_set_header Connection "";
 proxy_http_version 1.1;
 proxy_connect_timeout  300;
 proxy_read_timeout 300;


 access_log /var/log/nginx/ralph-access.log;
 error_log /var/log/nginx/ralph-error.log;

 location /static {
 alias /usr/share/ralph/static;
 access_log        off;
 log_not_found     off;
 expires 1M;
 }

 #location /media {
  #    alias /var/local/ralph/media;
  #    add_header Content-disposition "attachment";
  #}

 location / {
      proxy_pass http://127.0.0.1:8000;
      include /etc/nginx/uwsgi_params;
      proxy_set_header Host $http_host;
      proxy_set_header X-Forwarded-For $proxy_add_x_forwarded_for;
  }
  }
Note: Don’t forget to replace the ralph.example.com with your domain name for Ralph.
Then restart the nginx services.
sudo systemctl restart nginx.service

Check the status of Nginx
sudo systemctl status nginx

Step 7: Access Ralph Dashboard
Now, you can access Ralph dashboard by typing 127.0.0.1:8000 in your browser

Login with the superuser we’ve created earlier during our configuration.
Now, you will be directed towards the dashboard where you can see the demo data we’ve imported.

Here you can see the data we’ve imported earlier.

So, this is how we can Install Ralph Asset Management System on Ubuntu 18.04.
