

Hello, friends. In this post, you will learn how to install CSF (Config Server Firewall) on CentOS 8 as an alternative to the Firewalld we know.
CSF is A Stateful Packet Inspection (SPI) firewall, Login/Intrusion Detection, and Security application for Linux servers.
It consists of the firewall itself (CSF) which is comprehensive, straightforward, easy, and flexible to configure.
It also has a Login Failure Daemon (LFD) that perfectly complements CSF. This LFD runs all the time and periodically (every X seconds) scans the latest log file entries for login attempts against your server that continually fail within a short period of time. Such attempts are often called “Brute-force attacks” and the daemon process responds very quickly to such patterns and blocks offending IP’s quickly
Finally, you can configure and use CFS with a convenient graphical web interface that is secure and stable.
Install CSF on CentOS 8
As expected CSF is not available in the official CentOS repositories. However, it is possible to install it as it is strongly linked to Perl and this language is supported on CentOS 8.
So, open a terminal session and update CentOS 8
sudo dnf install
In the end, install the Perl elementary modules and other tools that we will use later like nano or tar.
sudo dnf install @perl curl tar nano
At the end of the installation, you have to install other extra Perl modules on CentOS 8
sudo dnf install perl-libwww-perl.noarch perl-LWP-Protocol-https.noarch perl-GDGraph
You can verify the installation of Perl by running the command:
perl -v
This is perl 5, version 26, subversion 3 (v5.26.3) built for x86_64-linux-thread-multi
(with 51 registered patches, see perl -V for more detail)

Copyright 1987-2018, Larry Wall

Perl may be copied only under the terms of either the Artistic License or the
GNU General Public License, which may be found in the Perl 5 source kit.

Complete documentation for Perl, including FAQ lists, should be found on
this system using "man perl" or "perldoc perl".  If you have access to the
Internet, point your browser at http://www.perl.org/, the Perl Home Page.
You will get an output screen similar to this one.
Now you can download CSF using the curl command
curl -O https://download.configserver.com/csf.tgz
  % Total    % Received % Xferd  Average Speed   Time    Time     Time  Current
                                 Dload  Upload   Total   Spent    Left  Speed
100 2238k  100 2238k    0     0  37.0M      0 --:--:-- --:--:-- --:--:-- 37.0M
As you can notice, it is quite lightweight. Now unzip it.
tar xvfz csf.tgz
Access the folder that is generated, and inside it, run the installation script called install.sh.
cd csf
sudo sh install.sh
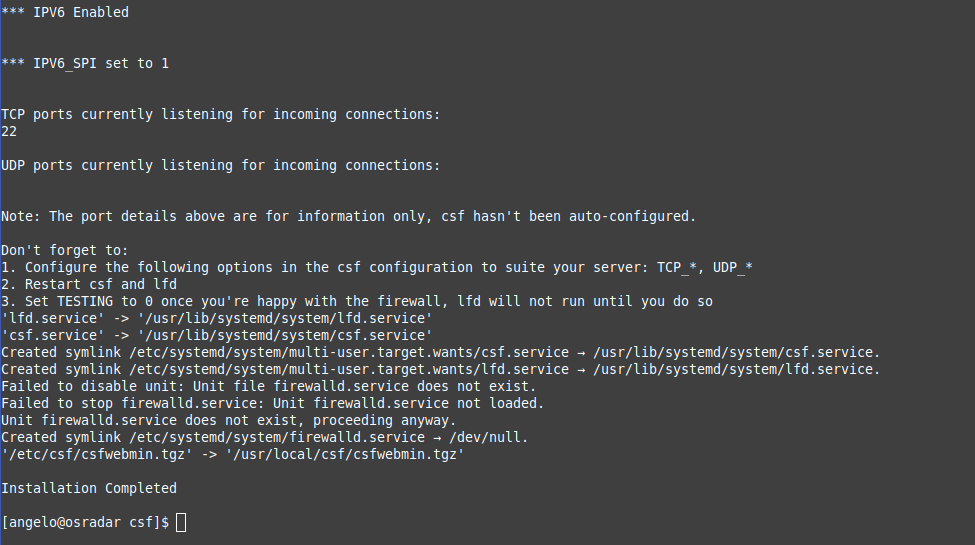
This will start the installation process and the default configuration will be applied.
Configuring Config Server Firewall on CentOS 8
When installed, CFS applies some very good default settings, however, each of us has some fine-tuning to do.
The file is /etc/csf/csf.conf which should be backed up before editing to be sure.
sudo nano /etc/csf/csf.conf

And in this file, you will find a lot of very well-documented parameters. And one of the most important sections is the one that lists the open ports for incoming and outgoing connections.
In this same file you can enable or disable CSF by changing the following value:
TESTING = "1"
For
TESTING = "0"
This way you indicate to the program that it is ready to start.
Save the changes and close the file.
Now you can start the CSF service.
sudo systemctl enable --now csf
It is also advisable to check the status of the service to see if it is running properly.
sudo systemctl status csf
● csf.service - ConfigServer Firewall & Security - csf
   Loaded: loaded (/usr/lib/systemd/system/csf.service; enabled; vendor preset: disabled)
   Active: active (exited) since Tue 2021-04-06 18:09:27 CEST; 57s ago
 Main PID: 6331 (code=exited, status=0/SUCCESS)
    Tasks: 0 (limit: 12118)
   Memory: 0B
   CGroup: /system.slice/csf.service

Apr 06 18:09:27 osradar csf[6331]: ACCEPT  all opt    in * out lo  ::/0  -> ::/0
Apr 06 18:09:27 osradar csf[6331]: LOGDROPOUT  all opt    in * out !lo  ::/0  -> ::/0
Apr 06 18:09:27 osradar csf[6331]: LOGDROPIN  all opt    in !lo out *  ::/0  -> ::/0
Apr 06 18:09:27 osradar csf[6331]: csf: FASTSTART loading DNS (IPv4)
Apr 06 18:09:27 osradar csf[6331]: csf: FASTSTART loading DNS (IPv6)
Apr 06 18:09:27 osradar csf[6331]: LOCALOUTPUT  all opt -- in * out !lo  0.0.0.0/0  -> 0.0.0.0/0
Apr 06 18:09:27 osradar csf[6331]: LOCALINPUT  all opt -- in !lo out *  0.0.0.0/0  -> 0.0.0.0/0
Apr 06 18:09:27 osradar csf[6331]: LOCALOUTPUT  all opt    in * out !lo  ::/0  -> ::/0
Apr 06 18:09:27 osradar csf[6331]: LOCALINPUT  all opt    in !lo out *  ::/0  -> ::/0
Apr 06 18:09:27 osradar systemd[1]: Started ConfigServer Firewall & Security - csf.
You can also check the ports that are open when CSF is running.
sudo csf -p
Ports listening for external connections and the executables running behind them:
Port/Proto Open Conn  PID/User             Command Line                            Executable
22/tcp     4/6  2     (1161/root)          /usr/sbin/sshd -D -oCiphers=aes256-g... /usr/sbin/sshd
323/udp    -/-  -     (738/chrony)         /usr/sbin/chronyd                       /usr/sbin/chronyd
Enabling the WEb interface
We can manage CSF from a convenient web interface, but we have to enable it.
To do this, edit the configuration file again and locate the UI parameter.
sudo nano /etc/csf/csf.conf
And make the change
UI = "0"
For
UI = "1"
And you can change other useful parameters like user and password to access it:
UI_USER = "username"
UI_PASS = "password"
Also, you can change the port.
UI_PORT = "6666"
Save the changes and close the editor.
Now add the IP address of the host that will be able to access the GUI:
sudo nano /etc/csf/ui/ui.allow
Save the changes and restart the services to apply the changes.
sudo systemctl restart csf
Conclusion
In this post, you have learned how to install Config Server Firewall on CentOS 8 As you can notice the process is not complex but it does require some extra steps to complete the process. You can read more about it in its official documentation and support us by sharing the post.
