
")
Hello! Since Windows 7 new features associated with virtual hard disks have been implemented. Consequently, it represents a great advantage regarding back up and storage. Today, we will learn how to manage a virtual hard disk in Windows 10.
What is a virtual hard disk
A virtual hard disk or VHD is a container that mimics the entire file structure of the physical hard disk. In addition, this virtual hard disk can be stored in any space on the computer. Virtual machines make use of these virtual hard disks. In effect, they serve to simulate an operating system.

Advantages of virtual hard disks
When creating virtual hard disks in Windows 10 we have the following advantages:
- VHD do not require an actual partition on the physical hard disk. Consequently, it does not take up unnecessary space on the system.
- The backup of this type of disks is simple.
- Possibility of creating dynamic hard disks.
- It is possible to install an operating system on a virtual hard disk to have the option of dual-booting on Windows 10.
- Ease of deleting a virtual hard disk.
- Virtual hard disks are compatible with Windows, macOS, and Linux operating systems.
- A virtual hard disk can be accessed from a local network.
There are 3 types of virtual hard disks:
Fixed virtual hard disk
This mode requires a storage space equivalent to the size of the virtual disk.
Dynamically expanding virtual hard disk
This type of disk requires a minimum of 8 MB of available space. In addition, this size increases automatically as the data increases.
Differencing virtual hard disk
This type of disk requires little physical storage space. However, it requires more space as the disk size increases.
Next, we will see how to create a virtual hard disk in Windows 10.
How to create a VHD in Windows 10
To perform this task, it is necessary to enter the disk manager. With this in mind, perform the following steps.
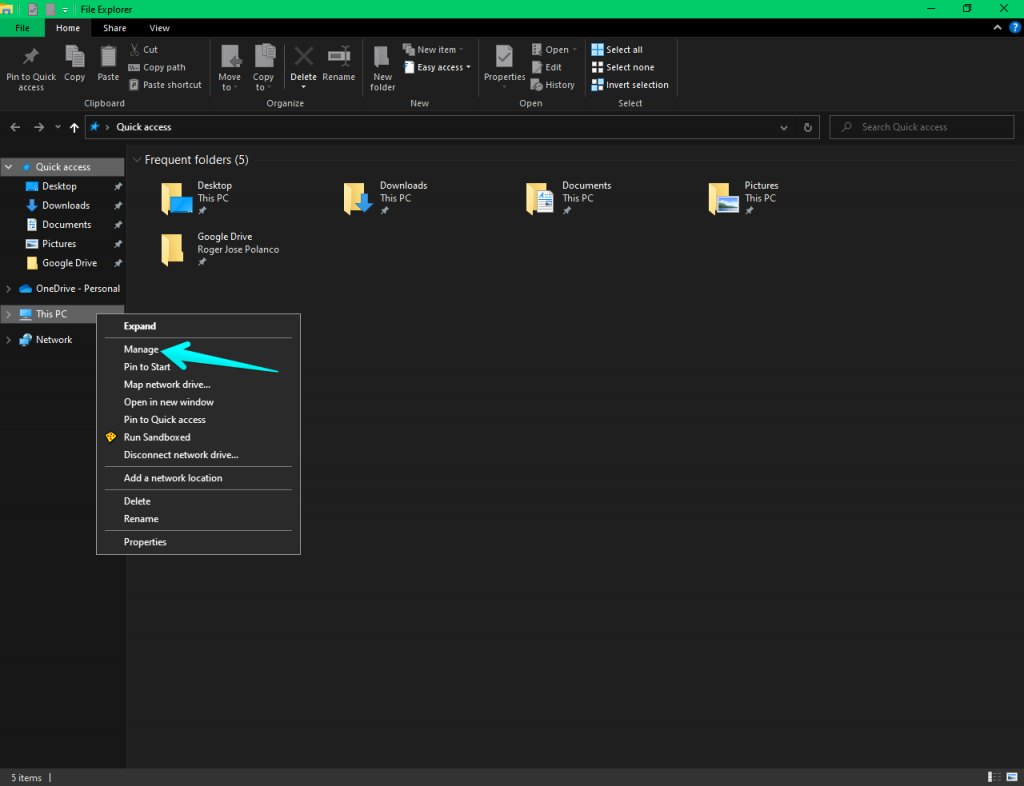
- First, open the file explorer. With this intention, press the Win+E combination.
- Once there, please right-click on This PC. Then select the Manage option.
- Once there, just click on Disk Management.

Immediately, you will see the disk management window.

- Now, from the Actions menu, please click on Create VHD.

- Immediately, the creation wizard will be displayed:

- In this window, we will configure several elements. First the name and location of the new virtual hard disk. Additionally, the format and type of the disk. The window is sufficiently explicit about the available variables. This time, we will select a dynamically sized VHDX disk.
- After defining the parameters, we only have to press OK to start the virtual hard disk creation process. After a few moments, we will see the new disk in the disk management. Furthermore, it is created but not yet formatted.

Initializing the virt hard disk
- Now it is time to initialize the virtual hard disk. With this in mind, right-click on the disk in the disk manager. Next, select the option.

- In the following window, please maintain the default values

After the disk is initialized, we have to assign a letter and enable it. With this in mind, right-click on the mouse and then click on New Simple Volume.

Then the wizard for the creation of the new simple volume is displayed. Click Next to continue.

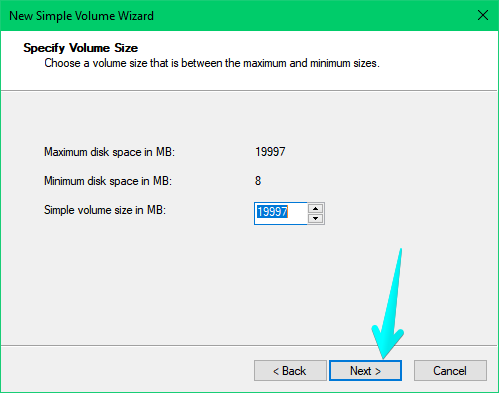
In the next window, you only have to assign the amount of space for the virtual disk.
Next, define the letter to be assigned to the virtual disc. You can also mount it in a NFTS folder.

In the next window, set whether you are going to format the volume. We can also assign a name to the virtual hard disk.

When you click next, you will see a window with a summary of the task to be performed. You only have to verify the parameters. If you do not agree, you can go back and make the necessary changes. Otherwise, press finish to execute the task. Consequently, we will see the virtual hard disk correctly created.

When we enter the file explorer, we will see the virtual hard disk successfully created.
How to eject and remount the virtual hard disk in Windows 10
From now on, we can manage the virtual disk just like a regular physical disk. Indeed, it is possible to eject it and mount it again. To unmount it, first enter the file explorer. Once there, right-click on the disk and finally select the Eject option.

To mount it again, it is enough to go to the path where we have saved the virtual disk. Finally, just double-click on it and select Mount.

How to remove a virtual hard disk in Windows 10
The procedure for deleting a virtual hard disk is simple. In fact, you just have to go back to the disk management. Please refer to the previous sections to learn how to do it. Once there, please right-click on the VHD. Then select the Delete Volume option.

You will see a warning screen. Please confirm the action.

Back to the disk manager, we will see the disk still present but Unallocated.

To delete it permanently, right-click on the Disk 1 field. Now click on the Detach VHD option.

After confirming the action, we will see that the VHD is no longer available.

Ultimately, we have seen how to manage a virtual hard disk in Windows 10. An opportunity to get more storage on our system. With the advantage of not taking up so much space on storage systems. See you soon!
