
Today we are going to learn that how to install Mattermost on CentOS 8 With Nginx. Mattermost is an Open Source platform where you can chat online, and perform different actions like sharing of data, searching and indexing. It provides the facility of Integrations with DevOps tools. It can be operated mostly on all devices like Android, Windows, Linux and Mac Operating systems. Let’s move towards the installation of Mattermost on our CentOS 8 system.
Step 1: Update your System
First of all as usual we do, update your system.
sudo yum -y update && sudo yum -y upgrade
Then reboot the system.
sudo reboot
Step 2: Installing Database Server
As Mattermost requires a Database Server, so I’ll recommend you to choose MariaDB for this purpose. Install it by typing the given command in your terminal.
sudo yum -y install @mariadb
sudo systemctl enable --now mariadb
sudo mysql_secure_installation
Once, you finished installing Database, simply log in to it to set up the database for the Mattermost to be used.
mysql -u root -p
 CREATE DATABASE mattermost;
 GRANT ALL PRIVILEGES ON mattermost.* TO mattermost@localhost IDENTIFIED BY 'Your_Password';
 FLUSH PRIVILEGES;
 QUIT;
Step 3: Installing Mattermost
Now, start to install the Mattermost on your CentOS 8 system. First of all add the system user for managing the Mattermost service.
sudo useradd -d /opt/mattermost -U -M mattermost
Then you can visit the official download page of Mattermost to see the latest version available and download it via wget command.
wget https://releases.mattermost.com/5.21.0/mattermost-5.21.0-linux-amd64.tar.gz
Once, downloaded extract it with the help of tar command.
tar xvf mattermost-5.21.0-linux-amd64.tar.gz
And then move the resultant to the /opt directory.
sudo mv mattermost /opt
Then create a directory where users data like images and files they post on Mattermost would be stored.
sudo mkdir /opt/mattermost/data
And apply the permissions
sudo chown -R mattermost:mattermost /opt/mattermost
sudo chmod -R g+w /opt/mattermost
Now, configure the DB driver by editing the config.json file under /opt/mattermost/config/
sudo nano /opt/mattermost/config/config.json
Here do the two changes one is setting DriverName as “mysql” and the other is DataSource to the same as given below in config file
It would look like the given below
"SqlSettings": {
         "DriverName": "mysql",
         "DataSource": "mattermost:Your_Password@tcp(localhost:3306)/mattermost?charset=utf8mb4,utf8\u0026readTimeout=30s\u0026writeTimeout=30s",
         "DataSourceReplicas": [],
         "DataSourceSearchReplicas": [],
         "MaxIdleConns": 20,
         "ConnMaxLifetimeMilliseconds": 3600000,
         "MaxOpenConns": 300,
         "Trace": false,
         "AtRestEncryptKey": "myyti1r597i99qrk7eu91ywqhaawz4md",
         "QueryTimeout": 30
     },
Now, switch to the Mattermost directory.
cd /opt/mattermost
Then start the Matermost server.
sudo -u mattermost ./bin/mattermost
Output:
You’ll see the similar output.

Step 4: Configuring systemd file for Mattermost
Now, create the systemd file.
sudo tee /etc/systemd/system/mattermost.service<<EOF
 [Unit]
 Description=Mattermost
 After=syslog.target network.target mariadb.service
 [Service]
 Type=notify
 WorkingDirectory=/opt/mattermost
 User=mattermost
 ExecStart=/opt/mattermost/bin/mattermost
 PIDFile=/var/run/mattermost.pid
 TimeoutStartSec=3600
 LimitNOFILE=49152
 [Install]
 WantedBy=multi-user.target
 EOF
Then set the SELinux to the permissive mode or you can disable it.
sudo setenforce 0

sudo sed -i 's/^SELINUX=.*/SELINUX=permissive/g' /etc/selinux/config
And run the following command to run the services.
sudo systemctl daemon-reload
sudo systemctl enable --now mattermost
Verify the status by typing
systemctl status mattermost.service
Output:
[sabi@localhost ~]$ systemctl status mattermost.service
 ● mattermost.service - Mattermost
    Loaded: loaded (/etc/systemd/system/mattermost.service; enabled; vendor pres>
    Active: active (running) since Wed 2020-04-01 09:29:54 EDT; 6min ago
  Main PID: 2142 (mattermost)
     Tasks: 28 (limit: 11343)
    Memory: 141.0M
    CGroup: /system.slice/mattermost.service
            ├─2142 /opt/mattermost/bin/mattermost
            └─2253 plugins/com.mattermost.nps/server/dist/plugin-linux-amd64
 Apr 01 09:29:56 localhost.localdomain mattermost[2142]: {"level":"info","ts":15>
 Apr 01 09:29:57 localhost.localdomain mattermost[2142]: {"level":"info","ts":15>
 Apr 01 09:29:57 localhost.localdomain mattermost[2142]: {"level":"info","ts":15>
 Apr 01 09:29:59 localhost.localdomain mattermost[2142]: {"level":"info","ts":15>
 Apr 01 09:30:02 localhost.localdomain mattermost[2142]: {"level":"info","ts":15>
 Apr 01 09:30:09 localhost.localdomain mattermost[2142]: {"level":"info","ts":15>
 Apr 01 09:30:19 localhost.localdomain mattermost[2142]: {"level":"info","ts":15>
 Apr 01 09:30:25 localhost.localdomain mattermost[2142]: {"level":"info","ts":15>
 Apr 01 09:30:29 localhost.localdomain mattermost[2142]: {"level":"info","ts":15>
 Apr 01 09:30:39 localhost.localdomain mattermost[2142]: {"level":"info","ts":15>
 lines 1-20/20 (END)
Also make sure that Mattermost is running by typing
curl http://localhost:8065
Here you will see HTML about the Mattermost.
Step 5: Configuring Nginx with Mattermost
To configure Nginx with mattermost, install it by
sudo dnf -y install epel-release
sudo dnf -y install nginx
Then enable the Nginx services
sudo systemctl enable --now nginx
And configure the Nginx Server as a Proxy Server to use it for the Mattermost. For this edit the mattermost.conf file.
sudo nano /etc/nginx/conf.d/mattermost.conf
Then paste the below content into the file.
upstream backend {
    server 127.0.0.1:8065;
    keepalive 32;
 }
 proxy_cache_path /var/cache/nginx levels=1:2 keys_zone=mattermost_cache:10m max_size=3g inactive=120m use_temp_path=off;
 server {
    listen 80;
    server_name    mattermost.example.com;
 location ~ /api/v[0-9]+/(users/)?websocket$ {
        proxy_set_header Upgrade $http_upgrade;
        proxy_set_header Connection "upgrade";
        client_max_body_size 50M;
        proxy_set_header Host $http_host;
        proxy_set_header X-Real-IP $remote_addr;
        proxy_set_header X-Forwarded-For $proxy_add_x_forwarded_for;
        proxy_set_header X-Forwarded-Proto $scheme;
        proxy_set_header X-Frame-Options SAMEORIGIN;
        proxy_buffers 256 16k;
        proxy_buffer_size 16k;
        client_body_timeout 60;
        send_timeout 300;
        lingering_timeout 5;
        proxy_connect_timeout 90;
        proxy_send_timeout 300;
        proxy_read_timeout 90s;
        proxy_pass http://backend;
    }
 location / {
        client_max_body_size 50M;
        proxy_set_header Connection "";
        proxy_set_header Host $http_host;
        proxy_set_header X-Real-IP $remote_addr;
        proxy_set_header X-Forwarded-For $proxy_add_x_forwarded_for;
        proxy_set_header X-Forwarded-Proto $scheme;
        proxy_set_header X-Frame-Options SAMEORIGIN;
        proxy_buffers 256 16k;
        proxy_buffer_size 16k;
        proxy_read_timeout 600s;
        proxy_cache mattermost_cache;
        proxy_cache_revalidate on;
        proxy_cache_min_uses 2;
        proxy_cache_use_stale timeout;
        proxy_cache_lock on;
        proxy_http_version 1.1;
        proxy_pass http://backend;
    }
 }
Note: Substitute the mattermost.example.com with your domain name.
Now, verify the Nginx syntax
sudo nginx -t
nginx: the configuration file /etc/nginx/nginx.conf syntax is ok
nginx: configuration file /etc/nginx/nginx.conf test is successful
If everything results good, restart the nginx services.
sudo systemctl restart nginx
And allow the firewall access on http & https ports.
sudo firewall-cmd --add-service={http,https} --permanent
sudo firewall-cmd --reload
Verify the Nginx status by
sudo systemctl status nginx
● nginx.service - The nginx HTTP and reverse proxy server
    Loaded: loaded (/usr/lib/systemd/system/nginx.service; enabled; vendor prese>
    Active: active (running) since Wed 2020-04-01 09:55:27 EDT; 1min 56s ago
   Process: 4276 ExecStart=/usr/sbin/nginx (code=exited, status=0/SUCCESS)
   Process: 4274 ExecStartPre=/usr/sbin/nginx -t (code=exited, status=0/SUCCESS)
   Process: 4271 ExecStartPre=/usr/bin/rm -f /run/nginx.pid (code=exited, status>
  Main PID: 4277 (nginx)
     Tasks: 6 (limit: 11343)
    Memory: 10.2M
    CGroup: /system.slice/nginx.service
            ├─4277 nginx: master process /usr/sbin/nginx
            ├─4278 nginx: worker process
            ├─4279 nginx: worker process
            ├─4280 nginx: worker process
            ├─4281 nginx: worker process
            └─4282 nginx: cache manager process
 Apr 01 09:55:27 localhost.localdomain systemd[1]: Starting The nginx HTTP and r>
 Apr 01 09:55:27 localhost.localdomain nginx[4274]: nginx: the configuration fil>
 Apr 01 09:55:27 localhost.localdomain nginx[4274]: nginx: configuration file /e>
 Apr 01 09:55:27 localhost.localdomain systemd[1]: Started The nginx HTTP and re>
 lines 1-21/21 (END)
Now, you can access the Mattermost using the configured domain on Nginx.
$ curl mattermost.example.com
Step 6: Configuring Mattermost Server
Let’s move towards the configuration of Mattermost Server on the configured domain.
http://mattermost.example.com
Here you have to create an admin user on the first page. With the help of this user you can create and invite other users.

Then select weather you want to create a team or you want to go to the console.

Click on the Create a Team button and after providing the team name hit “Next“:

Then provide the team link and hit “Finish” button.
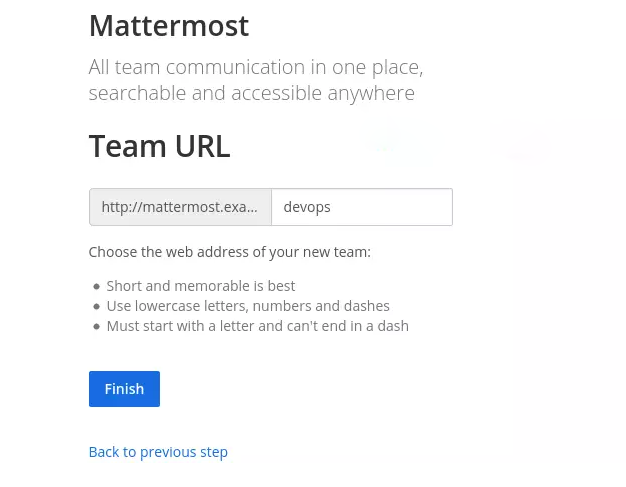
You will be directed towards the dashboard of Mattermost.

Here you can perform various tasks like inviting the new members, installing apps for PC. Mac, iOS and Android. It provides easy access as well as notification on the go.
Step 7: Configuring Let’s Encrypt SSL Certificate
As for security reasons I recommend you to install SSL Certificates. So, that the communication must be encrypted.
wget https://dl.eff.org/certbot-auto
chmod +x certbot-auto
sudo mv certbot-auto /usr/local/bin
Next stop the Nginx services.
sudo systemctl stop nginx
After it set up the procedure to get notified on expiry and obtain a free SSL certificate by setting up your domain name along with these.
export DOMAIN="mattermost.example.com"

export EMAIL_ALERTS="[email protected]"

sudo /usr/local/bin/certbot-auto certonly --standalone -d $DOMAIN --preferred-challenges http --agree-tos -n -m $EMAIL_ALERTS --keep-until-expiring
And update your Nginx configuration file to Encrypt with SSL.
Then restart the Nginx services.
sudo systemctl restart nginx.
Now, you can access the Mattermost over Secured SSL certificate via https. Visit the Mattermost documentation for more details.
So, this is how you can install and configure Mattermost with Nginx on CentOS 8.
