

Hello! I hope you are going well! This time I will talk to you about Jenkins, and how to install it on Windows 10. It is an open-source automation tool written in Java with plugins built for Continuous Integration purposes. It is multiplatform which means that is available for different operating systems, like OS X, Windows or Linux. In addition, because of uses Continous Integration, allows us to continuously deliver our software by integrating with a large number of testing and deployment technologies. In other words, this software facilitates the development work, inasmuch as, it is responsible for compiling and running tests of a whole project. Moreover, the process is carried out automatically, from time to time and through plugins, Jenkins let us know about the result of this test.
Installing Java SDK
In the first place, we need to download and install Java Development Kit JDK. Now, download the latest Jenkins package for Windows from here.
Installing Jenkins step by step

Unzip the file to any folder and click on the Jenkins EXE file.

Click Next to start the installation.

Select the folder to installation, if you want to change it, click on Change, if you do not, just click on Next.

Once the installation´s options had been set, we can click on Install to start the installation process.

When installer fishiness its job, click on Finish

Immediately, a web browser with a local Jenkins page will show up, if it not, we can paste the URL http://localhost:8080 in a browser.

Go to the indicated location and open the file with Notepad.

To unlock Jenkins, copy the password from the file at C:\Program Files (x86)\Jenkins\secrets\initialAdminPassw ord and paste it in the Administrator password field. Then, click the Continue button.

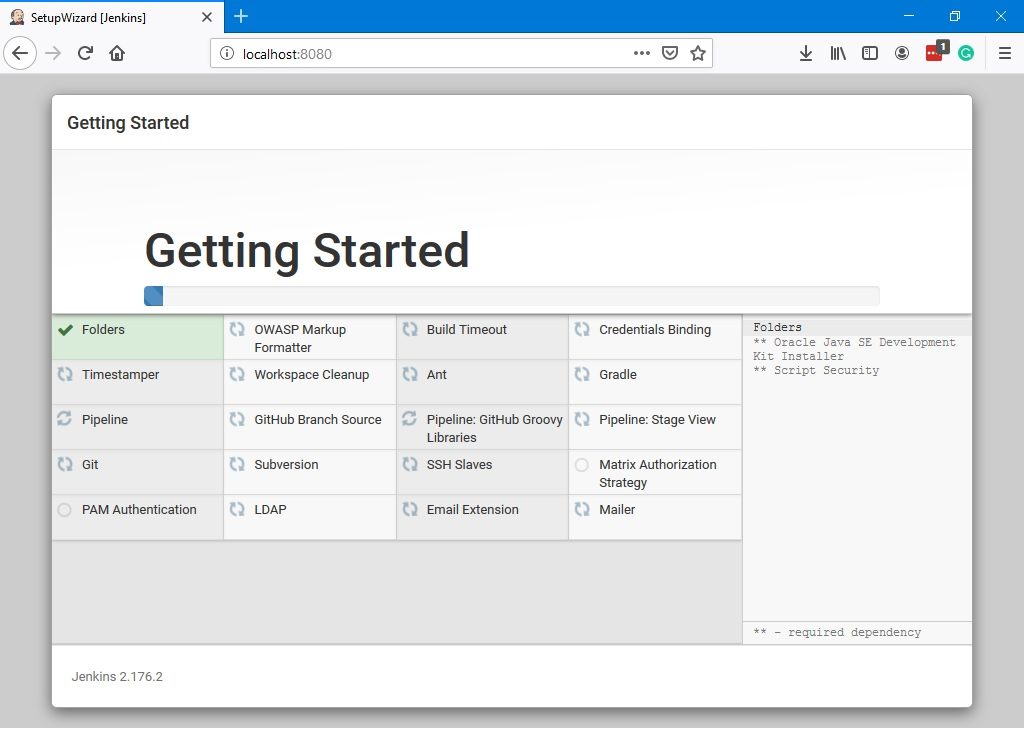
Then, we process to install plugins, either the suggested plugins or selected plugins we want. For now, please select the selected plugins and wait until plugin´s installation be completed
Once the plugin installation is succeeded, we have to create our credentials ton management Jenkins. Put in your details and click Save and Continue

Now, we have to choose the URL information where we can configure the default instance path for Jenkins. To avoid confusion, the software itself recommend setting this value to the URL. Click Save and Continue to finish the installation.

Hit the Start using Jenkins to start Jenkins

Finally, we had installed Jenkins successfully. A Dashboard will be appear. From now we can create our first Jenkins Jobs.

Conclussion
As has been noted, the Jenkins installation is an easy e intuitive proceed to do. However, this is a powerful tool to improve our developing works. I hope you can use this information to futures jobs and also I invited you to see our post about how to install an FTP server on Windows Server 2019.
