

Hello! We bring you a guide to clean spotless Windows 11. As a result, you will be able to remove all the programs and applications you don’t use. This is very useful if you have a brand new Windows 11 computer. It also works if you are upgrading from Windows 10 to Windows 11. Consequently, the process involves removing applications, freeing up space and organizing everything. In addition, it will help speed up the system and make it more organized. These are a series of tricks that we will try to simplify as much as possible. Therefore, it will not be very difficult for you to lighten your system.
Uninstall programs you do not use
Let’s start with the simplest step. That is to say, to uninstall all the applications that you do not need in Windows 11. The first thing that you have to do is to press the combination Win+I to go to Windows Settings. Once there, just click on Apps.

In the following window, we will see several options related to the Apps. Please click on Apps & Features.

A list of the apps installed on the system is immediately displayed. There is also a search engine to locate the specific ones you want to delete.

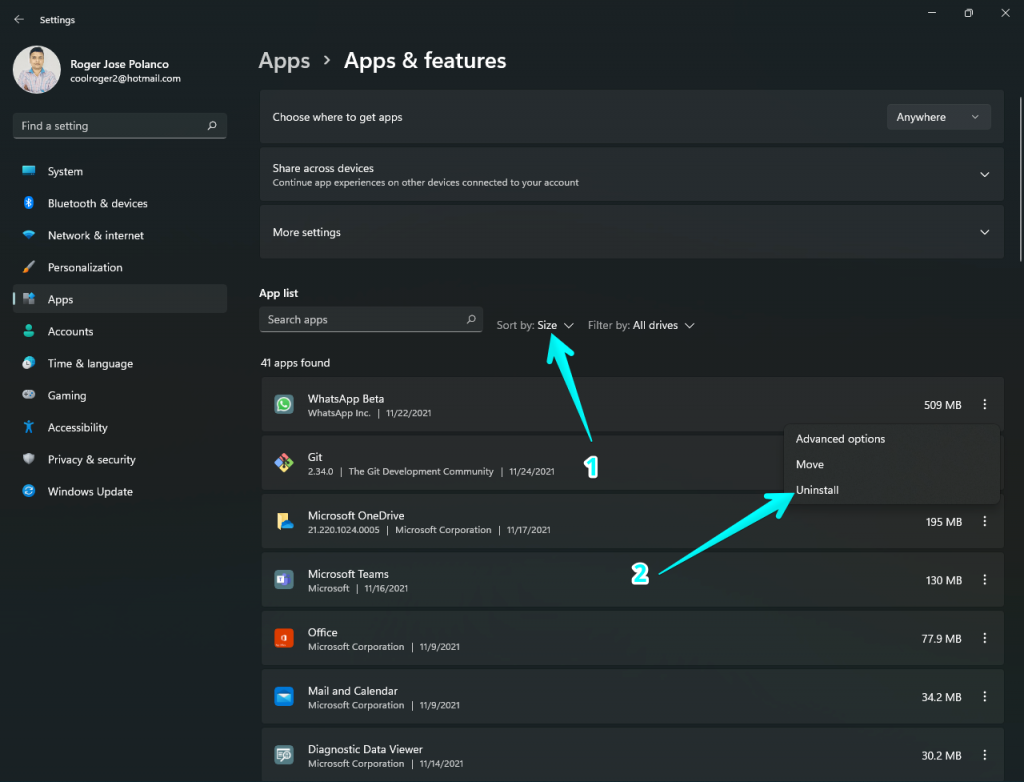
From this screen, just click on the 3 dots, and select the Uninstall option. Kindly note that this menu is on the right side of each App. Furthermore, be careful not to uninstall apps that are sensitive to the basic operation of Windows.

Occasionally, this section is not useful for uninstalling certain apps. Especially, those you have installed by downloading their .exe file. In these cases, it is necessary to resort to the uninstaller inherited from previous Windows versions. To do so, please open the Control Panel and select the Uninstall a program option. You will then open the old Windows uninstaller. Then the program list appears. Just click on an app to uninstall it. Occasionally, it will uninstall them by itself, and occasionally, it will launch the native uninstallation tool of each tool.

Check which apps take up the most space on the system.
Windows 11 also has a tool to know which apps take up the most space. Therefore, we can decide based on this info. With this in mind, follow the path Windows Settings>System>Storage. Once there, just click on the Apps and Features option.

Then, you just have to sort the apps by size. With this in mind, click the Sort button as shown in the image. Next, you will see the apps that take up the most space on your system. You can then uninstall them as shown in the previous section.
Removes applications that run at startup
There are always applications that start automatically when you start your computer. Also, sometimes they are configured that way when you install them. Fortunately, we can configure which applications run at startup. Just press the Ctrl+Shift+Esc combination to go to the Task Manager. Once there, click on Startup. From there you can see the apps that start with the system. Then, you have to look at the Status and Startup Impact column. The first one shows which apps are starting up or not with the system. In the Impact column we determine how much it can slow down the process of starting Windows.

With this information, you should disable the applications that have the most impact on computer startup. As a result, Windows will start faster. To disable any app, just right-click on it and select the Disable option.

Clean the Windows 11 desktop
One of the elements that can slow down Windows 11 is the desktop. Indeed, when Windows start, it has to load all the elements you have on it. Therefore, if there are many elements there, then Windows will be slower at the time of starting. Consequently, if you want Windows to start faster, then it is advisable to delete from the desktop everything you do not need. Note that applications are easily accessible from the Start menu. In addition, you can dock it there for faster access. If you require stuff on the desktop, then you can try to create a single folder and put it all there.

Pin applications to the start menu
In accordance with the previous step, we can pin apps to the start menu. It is well known that apps are displayed in this menu. However, we can pin them there as well. This way we will have them more easily at our reach. It is also possible to drag and drop them to arrange them as you like. To learn more about how to do these steps, we invite you to visit this tutorial.
Sorting and deleting folders from the hard disk
You may still have folders of already deleted applications. These items are just keeping residues of apps that are no longer needed. However, you should proceed with caution. In fact, it is not enough to open the explorer and delete folders as you please. Indeed, you could delete folders that are necessary for the system to function. Or you could delete folders of programs that are still installed. The applications you have installed create specific folders to download their contents to. These items can be logs, cache and other internal data of the apps. They are also stored in the path: C:\Users\username\AppData. Additionally, there are three sections: Local, LocalLow and Roaming. Just log in and see the names of applications and tools that have hosted items locally.

Use the quick access to organize folders
Continuing with the theme of folders, we can also use quick access to keep them more organized. This allows to have more accessible folders within the file explorer. This is a series of shortcuts that you can put at the top of the left column of the explorer. As a result, certain folders are always closer at hand. Of course, it is not recommended creating too many quick accesses. Indeed, the effect would be the opposite and would give a feeling of chaos. The idea is to highlight those folders that we use most often. With this in mind, open the file explorer and right-click on the folder you want to highlight. Then choose the Pin to quick access option.

Check the files that take up the most space
Apart from apps, other elements can also take up space within the system. Then we will resort to the Storage section that we studied earlier. Once there, please click on Other. From there, view those folders that take up the most space on the system. Then, with this information, you can consider deleting some of them.

Frees up hard disk space
It is also advisable to free up space on your hard drive. However, we will not resort to third-party applications. In fact, Windows 11 has its own space freer. To use it, open the Start menu. Now, type cleanmgr, and right-click on the tool to run it as administrator. In this application, we must select the disk to clean.

On the next screen, the application will calculate which files it can clean and how much space it can save you by doing so. This process can take anywhere from a few seconds to a few minutes. This depends on your computer, your hard drive and the accumulated files. When it is finished, you will be shown a list of various file types it can delete and the size you would free up by doing so. Simply select the file types you want to delete and click OK. You will get a prompt asking if you are sure, and here confirm the action.
Free up space with cleanup recommendations
Windows 11 has implemented several new features. One of them is the Cleanup recommendations. This option is in the section Storage that we have already mentioned. Besides, there are numerous steps are shown with which you can eliminate various types of files that are occupying space unnecessarily. There are four items to work with: temporary files, large unused files, those synchronized with the cloud, and applications that you have not used for some time. These tips are a good start to begin cleaning up your system.

Deleting temporary files
Another option you will see in the Storage section of the Windows settings is to delete temporary files. In addition, we will be able to specify which one to delete. In the Storage screen, you will see the total of space that these temporary files occupy. Then, making click, we will be able to erase them.

Okay, so we have seen how to clean Windows 11 spotless. With these tips, you will have a lighter and more comfortable system to use. Bye!
