

In this post, I’ll show you how to install Nagios on Debian 10.
Nagios is one of the best open source solutions for network and computer monitoring. Among the main features of Nagios are:
- Monitoring of network services (SMTP, POP3, HTTP, NNTP, PING, etc.)
- Monitoring of host resources (processor load, disk usage, etc.)
- Simple plugin design that allows users to easily develop their own service checks
- Parallelized service checks
- Ability to define network host hierarchy using “parent” hosts, allowing detection of and the distinction between hosts that are down and those that are unreachable
- Contact notifications when service or host problems occur and get resolved (via email, pager, or user-defined method)
- Ability to define event handlers to be run during service or host events for proactive problem resolution
- Automatic log file rotation
- Support for implementing redundant monitoring hosts
- Optional web interface for viewing current network status, notification and problem history, log file, etc.
So now you can see why Linux and even BSD have become so famous around the world.
Now we will install it on a computer with Debian 10.
Install Nagios on Debian 10
1.- Install some required packages
First of all, several necessary packages have to be installed. In this post, we will install Nagios from the source code of the same, so some packages become necessary.
So, open the terminal and run the following command:
:~$ sudo apt install autoconf gcc libc6 make wget unzip apache2 apache2-utils php libgd-dev
Reading package lists... Done
Building dependency tree
Reading state information... Done
libc6 is already the newest version (2.28-10).
unzip is already the newest version (6.0-23+deb10u1).
unzip set to manually installed.
wget is already the newest version (1.20.1-1.1).
The following additional packages will be installed:
  apache2-bin apache2-data automake autotools-dev binutils binutils-common binutils-x86-64-linux-gnu cpp cpp-8 gcc-8 libapache2-mod-php7.3 libapr1 libaprutil1
  libaprutil1-dbd-sqlite3 libaprutil1-ldap libasan5 libatomic1 libbinutils libbrotli1 libc-dev-bin libc6-dev libcc1-0 libcurl4 libdpkg-perl libexpat1-dev
  libfile-fcntllock-perl libfontconfig1-dev libfreetype6-dev libgcc-8-dev libgomp1 libice-dev libisl19 libitm1 libjansson4 libjbig-dev libjpeg-dev libjpeg62-turbo-dev
  liblsan0 liblua5.2-0 liblzma-dev libmpc3 libmpfr6 libmpx2 libpng-dev libpng-tools libpthread-stubs0-dev libquadmath0 libsigsegv2 libsm-dev libsodium23 libtiff-dev
  libtiffxx5 libtsan0 libubsan1 libvpx-dev libvpx5 libx11-dev libxau-dev libxcb1-dev libxdmcp-dev libxpm-dev libxt-dev linux-libc-dev m4 manpages-dev php-common php7.3
  php7.3-cli php7.3-common php7.3-json php7.3-opcache php7.3-readline pkg-config psmisc uuid-dev x11proto-core-dev x11proto-dev xorg-sgml-doctools xtrans-dev
  zlib1g-dev
Suggested packages:
  apache2-doc apache2-suexec-pristine | apache2-suexec-custom www-browser autoconf-archive gnu-standards autoconf-doc libtool gettext binutils-doc cpp-doc
  gcc-8-locales gcc-multilib flex bison gdb gcc-doc gcc-8-multilib gcc-8-doc libgcc1-dbg libgomp1-dbg libitm1-dbg libatomic1-dbg libasan5-dbg liblsan0-dbg libtsan0-dbg
  libubsan1-dbg libmpx2-dbg libquadmath0-dbg php-pear glibc-doc debian-keyring gnupg | gnupg2 patch git bzr freetype2-doc libice-doc liblzma-doc libsm-doc libx11-doc
  libxcb-doc libxt-doc m4-doc make-doc dpkg-dev
The following NEW packages will be installed:
  apache2 apache2-bin apache2-data apache2-utils autoconf automake autotools-dev binutils binutils-common binutils-x86-64-linux-gnu cpp cpp-8 gcc gcc-8
  libapache2-mod-php7.3 libapr1 libaprutil1 libaprutil1-dbd-sqlite3 libaprutil1-ldap libasan5 libatomic1 libbinutils libbrotli1 libc-dev-bin libc6-dev libcc1-0
  libcurl4 libdpkg-perl libexpat1-dev libfile-fcntllock-perl libfontconfig1-dev libfreetype6-dev libgcc-8-dev libgd-dev libgomp1 libice-dev libisl19 libitm1
  libjansson4 libjbig-dev libjpeg-dev libjpeg62-turbo-dev liblsan0 liblua5.2-0 liblzma-dev libmpc3 libmpfr6 libmpx2 libpng-dev libpng-tools libpthread-stubs0-dev
  libquadmath0 libsigsegv2 libsm-dev libsodium23 libtiff-dev libtiffxx5 libtsan0 libubsan1 libvpx-dev libvpx5 libx11-dev libxau-dev libxcb1-dev libxdmcp-dev libxpm-dev
  libxt-dev linux-libc-dev m4 make manpages-dev php php-common php7.3 php7.3-cli php7.3-common php7.3-json php7.3-opcache php7.3-readline pkg-config psmisc uuid-dev
  x11proto-core-dev x11proto-dev xorg-sgml-doctools xtrans-dev zlib1g-dev
0 upgraded, 87 newly installed, 0 to remove and 0 not upgraded.
Need to get 52.2 MB of archives.
After this operation, 195 MB of additional disk space will be used.
Do you want to continue? [Y/n]

It’s a lot of packages but the installation is fast.
2.- Download Nagios on Debian 10
We now proceed to download the Nagios source code. I will use the wget command for this.
So, go to the tmp folder and download from there:
:~$ cd /tmp/
:~$ wget -c https://github.com/NagiosEnterprises/nagioscore/releases/download/nagios-4.4.5/nagios-4.4.5.tar.gz -O nagios.tar.gz

When the download is complete, decompress the file so that we have the folder ready to work with.
:~$ tar xzf nagios.tar.gz
3.- Install Nagios on Debian 10
Now we proceed with the installation. First, access the folder resulting from the decompression.
:~$ cd nagios-4.4.5/
And then prepare the compilation with the following command:
:~$ ./configure --with-httpd-conf=/etc/apache2/sites-enabled
Creating sample config files in sample-config/ ...
*** Configuration summary for nagios 4.4.5 2019-08-20 ***:

General Options:
-------------------------
Nagios executable: nagios
Nagios user/group: nagios,nagios
Command user/group: nagios,nagios
Event Broker: yes
Install ${prefix}: /usr/local/nagios
Install ${includedir}: /usr/local/nagios/include/nagios
Lock file: /run/nagios.lock
Check result directory: /usr/local/nagios/var/spool/checkresults
Init directory: /lib/systemd/system
Apache conf.d directory: /etc/apache2/sites-enabled
Mail program: /bin/mail
Host OS: linux-gnu
IOBroker Method: epoll

Web Interface Options:
------------------------
HTML URL: http://localhost/nagios/
CGI URL: http://localhost/nagios/cgi-bin/
Traceroute (used by WAP): /usr/bin/traceroute
Review the options above for accuracy. If they look okay,
type 'make all' to compile the main program and CGIs.

Then proceed to build the package.
:~$ make all

Now, create the user and group for Nagios.
:~$ sudo make install-groups-users
This command only runs these two:
groupadd -r nagios
useradd -g nagios nagios
Now add the Apache user to the newly created Nagios group.
:~$ sudo usermod -aG nagios www-data

And now yes, install Nagios on Debian 10.
:~$ sudo make install

Now install the settings for the service or daemon.
:~$ sudo make install-daemoninit

Now it’s time to install the scripts and settings:
:~$ sudo make install-commandmode
/usr/bin/install -c -m 775 -o nagios -g nagios -d /usr/local/nagios/var/rw
chmod g+s /usr/local/nagios/var/rw
*** External command directory configured ***

:~$ sudo make install-config
/usr/bin/install -c -m 775 -o nagios -g nagios -d /usr/local/nagios/etc
/usr/bin/install -c -m 775 -o nagios -g nagios -d /usr/local/nagios/etc/objects
/usr/bin/install -c -b -m 664 -o nagios -g nagios sample-config/nagios.cfg /usr/local/nagios/etc/nagios.cfg
/usr/bin/install -c -b -m 664 -o nagios -g nagios sample-config/cgi.cfg /usr/local/nagios/etc/cgi.cfg
/usr/bin/install -c -b -m 660 -o nagios -g nagios sample-config/resource.cfg /usr/local/nagios/etc/resource.cfg
/usr/bin/install -c -b -m 664 -o nagios -g nagios sample-config/template-object/templates.cfg /usr/local/nagios/etc/objects/templates.cfg
/usr/bin/install -c -b -m 664 -o nagios -g nagios sample-config/template-object/commands.cfg /usr/local/nagios/etc/objects/commands.cfg
/usr/bin/install -c -b -m 664 -o nagios -g nagios sample-config/template-object/contacts.cfg /usr/local/nagios/etc/objects/contacts.cfg
/usr/bin/install -c -b -m 664 -o nagios -g nagios sample-config/template-object/timeperiods.cfg /usr/local/nagios/etc/objects/timeperiods.cfg
/usr/bin/install -c -b -m 664 -o nagios -g nagios sample-config/template-object/localhost.cfg /usr/local/nagios/etc/objects/localhost.cfg
/usr/bin/install -c -b -m 664 -o nagios -g nagios sample-config/template-object/windows.cfg /usr/local/nagios/etc/objects/windows.cfg
/usr/bin/install -c -b -m 664 -o nagios -g nagios sample-config/template-object/printer.cfg /usr/local/nagios/etc/objects/printer.cfg
/usr/bin/install -c -b -m 664 -o nagios -g nagios sample-config/template-object/switch.cfg /usr/local/nagios/etc/objects/switch.cfg

*** Config files installed ***

Remember, these are *SAMPLE* config files.  You'll need to read
the documentation for more information on how to actually define
services, hosts, etc. to fit your particular needs.

So, now you have to install the Apache configuration for Nagios.
:~$ sudo make install-webconf
/usr/bin/install -c -m 644 sample-config/httpd.conf /etc/apache2/sites-enabled/nagios.conf
if [ 0 -eq 1 ]; then \
ln -s /etc/apache2/sites-enabled/nagios.conf /etc/apache2/sites-enabled/nagios.conf; \
fi

*** Nagios/Apache conf file installed ***

After that, you have to enable the Apache module rewrite and cgi.
:~$ sudo a2enmod rewrite
:~$ sudo a2enmod cgi
Then, it’s time to create the user who will access Nagios. In addition to this, you’ll have to create a password for it.
:~$ sudo htpasswd -c /usr/local/nagios/etc/htpasswd.users nagiosadmin

Then, changes the permissions to the htpasswd file.
:~$ sudo chown www-data.www-data /usr/local/nagios/etc/htpasswd.users
:~$ sudo chmod 640 /usr/local/nagios/etc/htpasswd.users
Finally, restart all service.
:~$ sudo systemctl restart apache2
:~$ sudo systemctl start nagios
:~$ sudo systemctl status nagios

● nagios.service - Nagios Core 4.4.5
Loaded: loaded (/lib/systemd/system/nagios.service; enabled; vendor preset: enabled)
Active: active (running) since Wed 2020-01-29 19:09:23 EST; 4s ago
Docs: https://www.nagios.org/documentation
Process: 16901 ExecStartPre=/usr/local/nagios/bin/nagios -v /usr/local/nagios/etc/nagios.cfg (code=exited, status=0/SUCCESS)
Process: 16902 ExecStart=/usr/local/nagios/bin/nagios -d /usr/local/nagios/etc/nagios.cfg (code=exited, status=0/SUCCESS)
Main PID: 16903 (nagios)
Tasks: 6 (limit: 893)
Memory: 2.1M
CGroup: /system.slice/nagios.service
├─16903 /usr/local/nagios/bin/nagios -d /usr/local/nagios/etc/nagios.cfg
├─16904 /usr/local/nagios/bin/nagios --worker /usr/local/nagios/var/rw/nagios.qh
├─16905 /usr/local/nagios/bin/nagios --worker /usr/local/nagios/var/rw/nagios.qh
├─16906 /usr/local/nagios/bin/nagios --worker /usr/local/nagios/var/rw/nagios.qh
├─16907 /usr/local/nagios/bin/nagios --worker /usr/local/nagios/var/rw/nagios.qh
└─16908 /usr/local/nagios/bin/nagios -d /usr/local/nagios/etc/nagios.cfg

Jan 29 19:09:23 osradar nagios[16903]: qh: core query handler registered
Jan 29 19:09:23 osradar nagios[16903]: qh: echo service query handler registered
Jan 29 19:09:23 osradar nagios[16903]: qh: help for the query handler registered
Jan 29 19:09:23 osradar nagios[16903]: wproc: Successfully registered manager as @wproc with query handler
Jan 29 19:09:23 osradar nagios[16903]: wproc: Registry request: name=Core Worker 16906;pid=16906
Jan 29 19:09:23 osradar nagios[16903]: wproc: Registry request: name=Core Worker 16907;pid=16907
Jan 29 19:09:23 osradar nagios[16903]: wproc: Registry request: name=Core Worker 16905;pid=16905
Jan 29 19:09:23 osradar nagios[16903]: wproc: Registry request: name=Core Worker 16904;pid=16904
Jan 29 19:09:24 osradar nagios[16903]: Successfully launched command file worker with pid 16908
Jan 29 19:09:24 osradar nagios[16903]: HOST ALERT: localhost;DOWN;SOFT;1;(No output on stdout) stderr: execvp(/usr/local/nagios/libexec/check_ping, ...) failed.

4.- Test the installation
Now we can open our favorite web browser and go to http://server-ip/nagios and you will see the following.

Just type the user and the password you generated before.
When you do this, you will see the following screen that shows that Nagios is correctly installed on Debian 10.
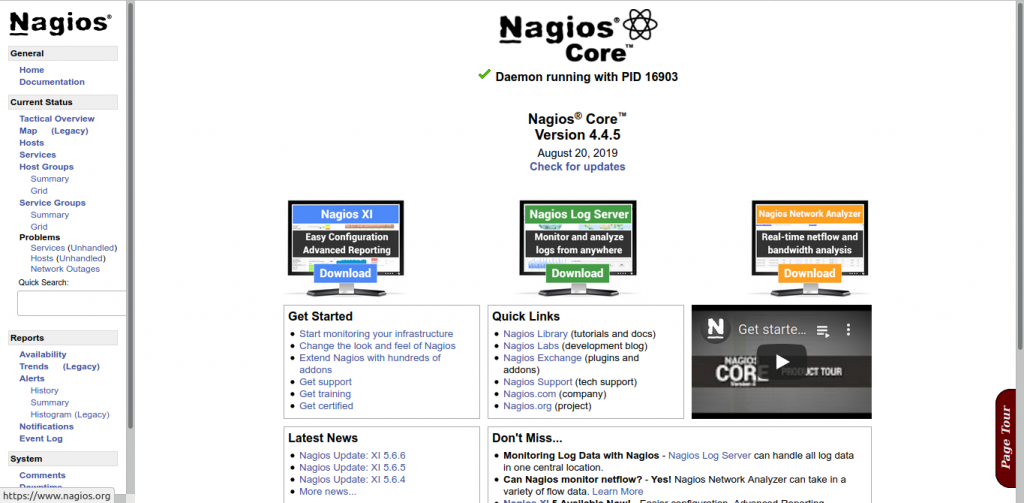
Now it is necessary to install the plugins to take full advantage of the application.
So, enjoy it.
Conclusion
In this post, you have learned how to install Nagios on Debian 10. This is one of the most important applications for monitoring computers out there. It’s a wonder to use it and will save you many hours of work.
Please share this post and join our Telegram channel.
