

Hello friends! It is a fact that there are many Android emulators for Windows, although if you want to test more specific versions and be dedicated to other formats such as Android Auto, it can become somewhat complicated. However, if you want to try Android Auto before buying a car that has it integrated, you can also try Android Auto in an emulator, with Android Studio. The goal is to simulate the screen of a car with Android Auto support. Unlike the version of Android Auto for phones that you can test with a traditional Android emulator. Android Auto screen emulation of a car is a bit more complicated. Although it allows you to accurately simulate what it’s like to connect your phone to a car and use Android Auto. This way you’ll get an idea of what it’s like to have Android Auto natively on Windows.
Install and prepare Android Studio
To use Android Auto on a PC we will use the official Google tools, so you must have Android Studio installed. To install Android Studio I recommend you to follow Osrardar’s tutorials:
Although it may seem contradictory, you don’t need to install the Android Studio emulator, because this type of emulation works differently. Once you have Android Studio installed, you need to open the SDK manager (Tools > SDK Manager menu) and go to the SDK Tools tab. There, you need to check the Android Auto Desktop Head Unit Emulator box and click OK to download and install it.

Connect your phone to the PC using ADB
In this case, it will not be necessary to download any additional components since Android Studio includes the necessary components to make possible the connection through ADB. If it fails, we recommend that you verify that the drivers are installed correctly, although it is not necessary nowadays.
Follow the steps below to connect your phone:
- Enable Developer Options in Android (Go to Settings>About phone, and tap five times on the build number).
- Enable USB debugging in the developer options.
- Connect the phone to the PC with a cable
- Allow USB debugging from your PC


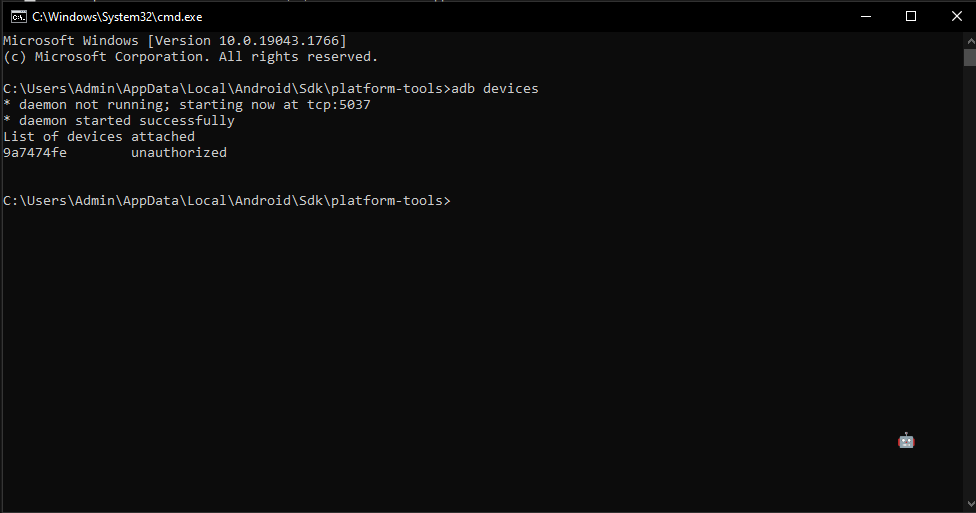
Then you will need to go to the path “C:\Users/User/AppData/Local/Android/Sdk/platform-tools” on your PC, changing the user to your Windows user name. Once you are in this path, in the Windows File Explorer search bar type “cmd” and press the Enter key.

After that, type the following command:
adb devices
If everything went well, you will see a single device and next to it the word device. Note that the device name is a code that does not mean anything.
Enable Android Auto development options
The normal version of Android Auto can be found in the system settings of your phone from Android 10 or higher, as it is part of Android. Use the search engine in the settings at the top if you can’t find it.
First step
Once you have entered the Android Auto section, tap several times on the version. Then tap ten times on the version information until a prompt tells you that developer options have been enabled.


Second step
Then, from the Android Auto menu, choose the “Start head unit server” option.

Connect your phone to Android Auto
To get started, connect your phone to your PC using a USB cable.
You will then need to enter an ADB command so that the server you just activated and the emulator on the PC can understand each other. Then go back on your PC to the “platform-tools” folder which is located in the following path: “C:\Users\User\AppData\Local\Android\Sdk\platform-tools”, changing user to your Windows username. Once you are in this path, in the Windows Explorer search bar type “cmd” and press the Enter key.
Then, type this command:
adb forward tcp:5277 tcp:5277

Now it is time to open the screen emulator for Windows. You do not need to start it from the command line, but you can double-click the desktop-head-unit.exe file. The Android Studio SDK manager normally installs it in path C:\Users/User/AppData/Local/Android/Sdk/Extras/Google/Auto.


Conclusion
When you are done, you can finally have your own Android Auto on Windows. The system perfectly emulates how Android Auto works with a phone connected to a compatible car, so you’ll be able to try out the vast majority of features. Thanks for reading us. Bye-bye!
